Tutorial : Balloons with Newton2
Music: “Against My Will” by The Fisherman
You can download the AEP with Newton2’s settings (CS6 and above) here.
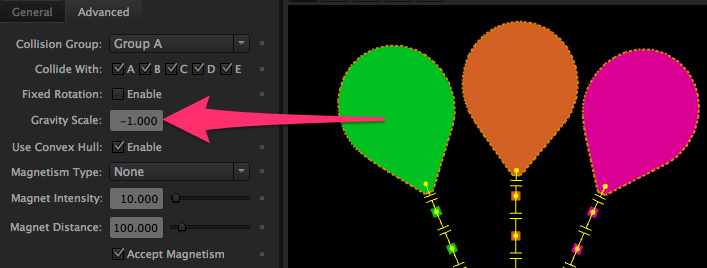
In this example, I wanted to illustrate the Gravity Scale feature in Newton2, and how we can use it to simulate flying balloons that interact with their environment.
Gravity Scale allows you to set a custom gravity per body.
I’ve used Connect Layers to represent the ropes attached to the balloons.
There’s no “Flying in the air” option in Newton, but you can somehow make objects fly if you use a negative Gravity Scale value!
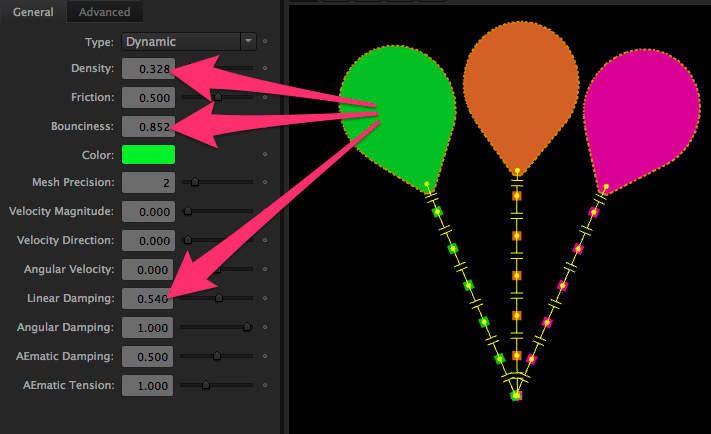
You need to tweak some parameters to make it look correct: for instance, balloons have lower density and higher bounciness coefficient. I’ve also increased the Linear Damping value to fake air resistance.
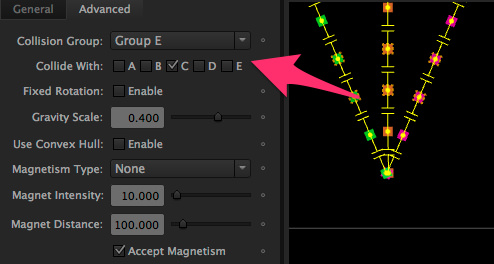
To add a sense of depth in the animation, I’ve used the Collision Group feature: the pink and green balloons collide with each other, but ignore the orange balloon. The little squares that simulate the ropes can only collide with the walls.
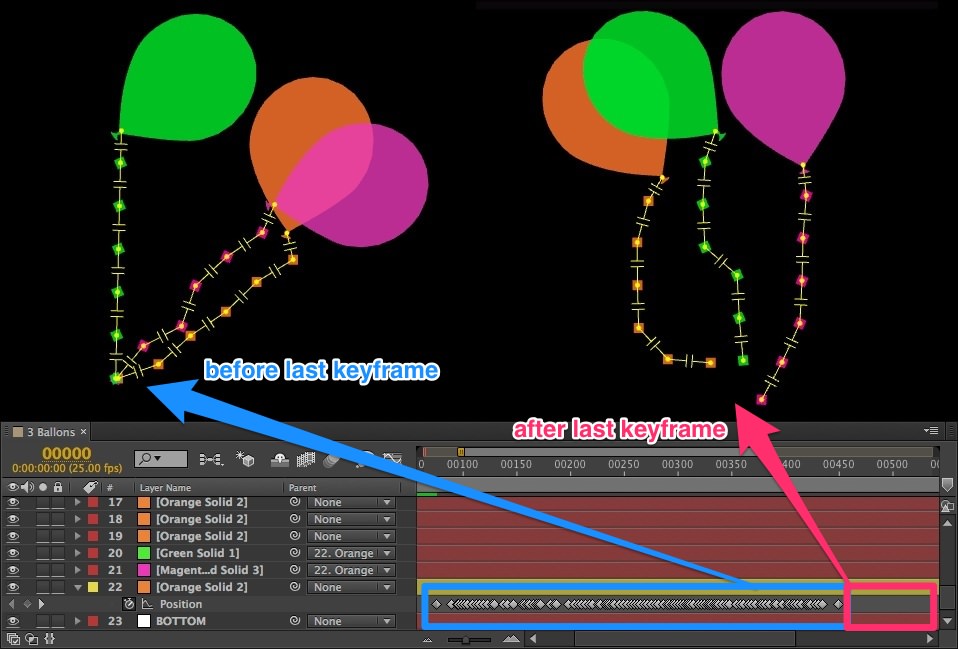
I’ve animated the hand graphics using AE’s Motion Sketch. I wanted the ropes to start from a unique point, but animated freely when the hand releases them. I’ve simply parented the start point of 2 ropes to the animated one. Then in Newton, I’ve chosen the Kinematic body type for all start points. At the end of keyframes animation, when bodies become dynamic, ropes move independently!
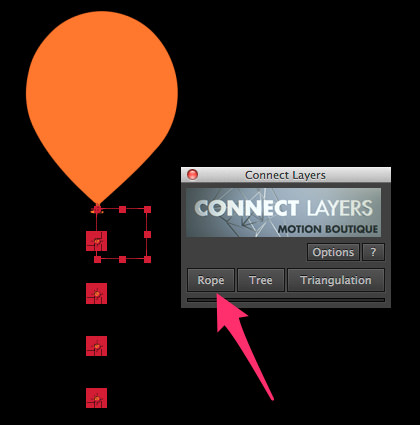
Creating the ropes was made easy by the use of the Rope feature of Connect Layers. You just need to select the reference objects, and hit Rope.
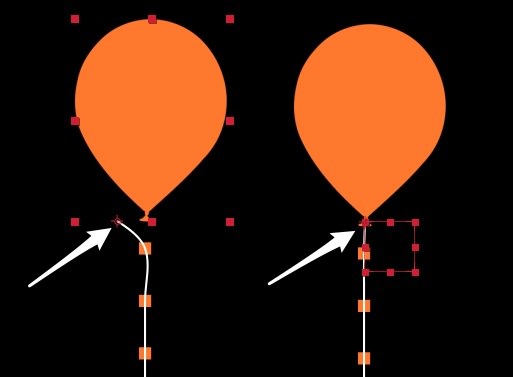
One common mistake is to forget to place the anchor point of your objects to the desire place, where the rope must pass through. You usually think about this after creating the keyframes in Newton. To solve this, create a null object, place it appropriately, and parent it to the reference object. Then choose the null instead of the reference object for creating the rope.


This is not really a tut. Its a brief explanation which isn’t all that helpful.
Hi Michelle,
Looks like you forgot to load the settings inside Newton, which show what you’re missing…
I apologize for the stupid question in advance. I just started downloading some of your tutorial files, however I can’t seem to load the .xml file into newton. Is there a specific way to load these settings so I can see the scene setup? Thanks.
Hullo,
Question1 -Why does my image look low res in the newton 2 preview window?
Question 2- I dont understand the anchor point. If I place the anchor point at the bottom of my balloon where the string goes then in Newton it appears higher up and my balloons spin from a more central part of the balloon which looks wrong. However if I move the anchor point down further to the cube second from the top then it looks right in Newton but when I render and make the rope, the rope bends at the top incorrectly. I have parented a null to the balloon and used this instead but the rope bends unnaturally. Why does Newton interpret the anchor point in this confusing way?
You can change the anchor point selecting the balloon joint and change the anchor point on the top of the screen =)
Hello,
I have the following problem. After creating the contour with the “RopeTool”, the transitions are displayed angularly and not round. In the options, the Bezier curves are set to automatic. If I change this to manually, it will be better. But not much. How does it work with the automatic function?