Tag Archives: After Effects

Trim Path Tricks

Attaching a layer to the end of a path using expression

NOTE: AE CC 2017 or later is required

Download the After Effects project with the code!

Icon

trim path trick

Download

Start Simple

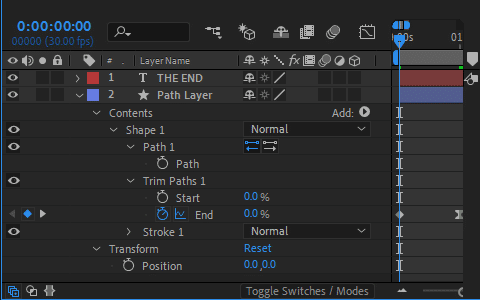
We first create a simple horizontal path using a shape layer. We make sure to set the layer’s position to 0,0 so the coordinates of the vertices will correspond to points in comp space (this will simplify a little bit our expression).

Start with a simple horizontal line

Then we add a Trim effector and create two keyframes to animate the end of the path from 0% to 100%. For the second key, we apply an Easy Ease In and multiply the influence of the incoming velocity by two (i.e., from 33.33% to 66.66%).

Now we create the layer we would like to attach to the end of the path. We make sure its position corresponds to the center of the comp (the default value) and its anchor point is located at the left hand side of the layer.
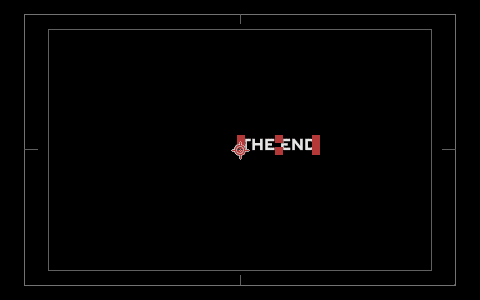
The layer to be attached to the path

The timeline looks like this:

Simple setup

To attach the layer to the path, we need to find the location (in comp space) of the end point of the path. This is done with the following position expression:

shapeGroup = thisComp.layer("Path Layer").content("Shape 1");
myPath = shapeGroup.content("Path 1").path;
trimEnd = shapeGroup.content("Trim Paths 1").end / 100;
endPt = myPath.pointOnPath(trimEnd);
The origin of the layer is “pushed” by the end of the path

Add Salt

Let’s see if we can add a small gap between the end of the path and the attached layer. Since our path is a straight horizontal line, we only need to shift the layer to the right along the x-axis. We add the following code to the previous expression:

...
gap = 15; // distance in px between the path and the layer
endPt + [gap,0];
Adding space bewteen the end of the path and the layer

Add Pepper

Now we would like to try with a more complex path, say an arbitrary Bezier path. Note that the end vertex has a non-zero tangent vector.
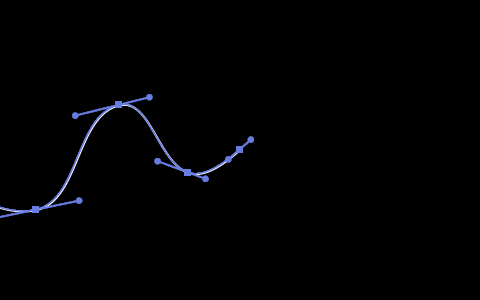
A more complex path

The code for the gap must be changed to take into account the direction pointed by the path (i.e., the tangent vector at the end of the path):

...
gap = 15; // distance in px between the path and the layer
tg = myPath.tangentOnPath(trimEnd);
endPt + gap * tg;
Adjusting the gap code

Add Cayenne Pepper

Now we would like to rotate the layer so it’s oriented along the path. To this end, we could use the corresponding built-in feature in AE:

Built-in auto-orientation along the path

Not that bad, but notice how the layer suddenly changes its orientation at the end of the animation. So let’s try to orient the layer using the following rotation expression (don’t forget to turn Auto-orient off before applying the expression):

shapeGroup = thisComp.layer("Path Layer").content("Shape 1");
myPath = shapeGroup.content("Path 1").path;
trimEnd = shapeGroup.content("Trim Paths 1").end / 100;
tg = myPath.tangentOnPath(trimEnd);
a = Math.atan2(tg[1],tg[0]);
radiansToDegrees(a);
Custom auto-orientation along the path

Great, the orientation looks correct now.

Cake For Dessert

For better control we could precompose our layer and make some design changes in the precomp. We don’t want the (precomp) layer to overlap the end of the path so we position the content of the precomp at the center of the precomp, and left-align the content since our path animation goes from left to right.
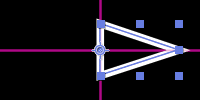
Working with a precomp
Using a precomp provides more control

Conclusion

We have shown how to attach a layer to the end of a path using simple expressions. Hope you find it useful!

If not, you can use or tool Connect Layers Pro to add arrow heads to your path!

Tutorial : Balloons with Newton2

Tutorial : Balloons with Newton2

The final product:

Music: “Against My Will” by The Fisherman

You can download the AEP with Newton2’s settings (CS6 and above) here.

In this example, I wanted to illustrate the Gravity Scale feature in Newton2, and how we can use it to simulate flying balloons that interact with their environment.
Gravity Scale allows you to set a custom gravity per body.
I’ve used Connect Layers to represent the ropes attached to the balloons.

There’s no “Flying in the air” option in Newton, but you can somehow make objects fly if you use a negative Gravity Scale value!

balloons gravity scale

You need to tweak some parameters to make it look correct: for instance, balloons have lower density and higher bounciness coefficient. I’ve also increased the Linear Damping value to fake air resistance.

balloons_settings

To add a sense of depth in the animation, I’ve used the Collision Group feature: the pink and green balloons collide with each other, but ignore the orange balloon. The little squares that simulate the ropes can only collide with the walls.

balloons_cg

I’ve animated the hand graphics using AE’s Motion Sketch. I wanted the ropes to start from a unique point, but animated freely when the hand releases them. I’ve simply parented the start point of 2 ropes to the animated one. Then in Newton, I’ve chosen the Kinematic body type for all start points. At the end of keyframes animation, when bodies become dynamic, ropes move independently!

balloons_parenting

Creating the ropes was made easy by the use of the Rope feature of Connect Layers. You just need to select the reference objects, and hit Rope.

balloons Connect Layers


One common mistake is to forget to place the anchor point of your objects to the desire place, where the rope must pass through. You usually think about this after creating the keyframes in Newton. To solve this, create a null object, place it appropriately, and parent it to the reference object. Then choose the null instead of the reference object for creating the rope.

balloons null connect layers

Download test scene

[wpdm_file id=1]

BLOG

[ess_grid alias=”blog”]

ASCII Generator

Music “Daft Punk – Get Lucky (Dualtrax Chiptune Cover)” by dualtrax

This After Effects script allows you to transform the content of the selected text layers into ASCII art. Credits must go to Patrick Gillepsie who wrote the hard part with his implementation of the FIGfont spec in JavaScript.

You may want to take a look at all fonts provided by the script: ASCII Fonts Grid

usage

Select at least one text layer
Choose an ASCII font
Click on Generate

Compatibility: CS5, CS6, and CC (and perhaps with older versions but not tested).

Quick Start Guide

DOWNLOAD

You can grab a copy of ASCII GENERATOR on aescripts

MORE TOOL

Create Gear

While browsing one of the Adobe Community forums to get info on Illustrator scripting, I came across this post and immediately thought it would be cool to port his script to After Effects. Gears are great shapes that can be used in various situations, but they are even better when you can animate them…

Create Gear panel

Note: There is an AE shape preset called Gear, but it uses 3 Polystars, 1 Ellipse and 3 Merge Path to create the gear (which makes adjustments more difficult).

USAGE

Activate a comp
Click on Create

Free material license

These scripts are copyrighted by Motion Boutique.
They are free for personal and commercial use but come “as is” with no warranty nor any free personal support.
Redistribution in any form is not allowed, instead always link to www.motionboutique.com for correct files.
By downloading any of these scripts, you agree the above terms.

DOWNLOAD

Icon

CreateGear

Download

MORE TOOL

3D Options

This After Effects script displays a palette that allows you to quickly modify the Geometry and Material options of the selected layers. If you want the panel to be dockable, place it into ScriptUI Panels folder.

USAGE:

  • Select some 3D layers.
  • Execute the script and modify parameters.
Icon

3D Options

Download

Cloth Simulation Test

Cloth simulation test done with AE scripting and expressions.

  • particles (little circles) are setup on a grid
  • particles are connected with springs
  • force is applied
  • finally layers are created at center of each cell, with expression-driven orientation and corner pin to fit the cell

BLOG

[ess_grid alias=”blog”]