
In this After Effects tutorial, discover how to simulate an organic, physics-driven car drift. We use our Newton plugin in two stages: first to simulate the driving dynamics (drift), then to calculate realistic collisions with the text.
Finally, we apply these movements to a 3D model imported directly into AE. An essential technique for Motion Designers!
Inspired by a Synthymental reel created with Cavalry and Forge Dynamics.
Get our tools for Adobe After Effects : https://aescripts.com/mobo-super-suite/
Questions or feedback? Feel free to join our Discord server
The goal of this tutorial is to simulate a realistic drifting motion using 2D physics, and then map that movement onto a 3D model for a high-quality render. We will use Newton for the rigid body simulation and the Advanced 3D renderer in AE for the car.
Links:
3D model : 1969 Dodge Charger by maregajavier
Environment HDR file : Blue Photo Studio
1. Composition Create a new composition (1920x1080).
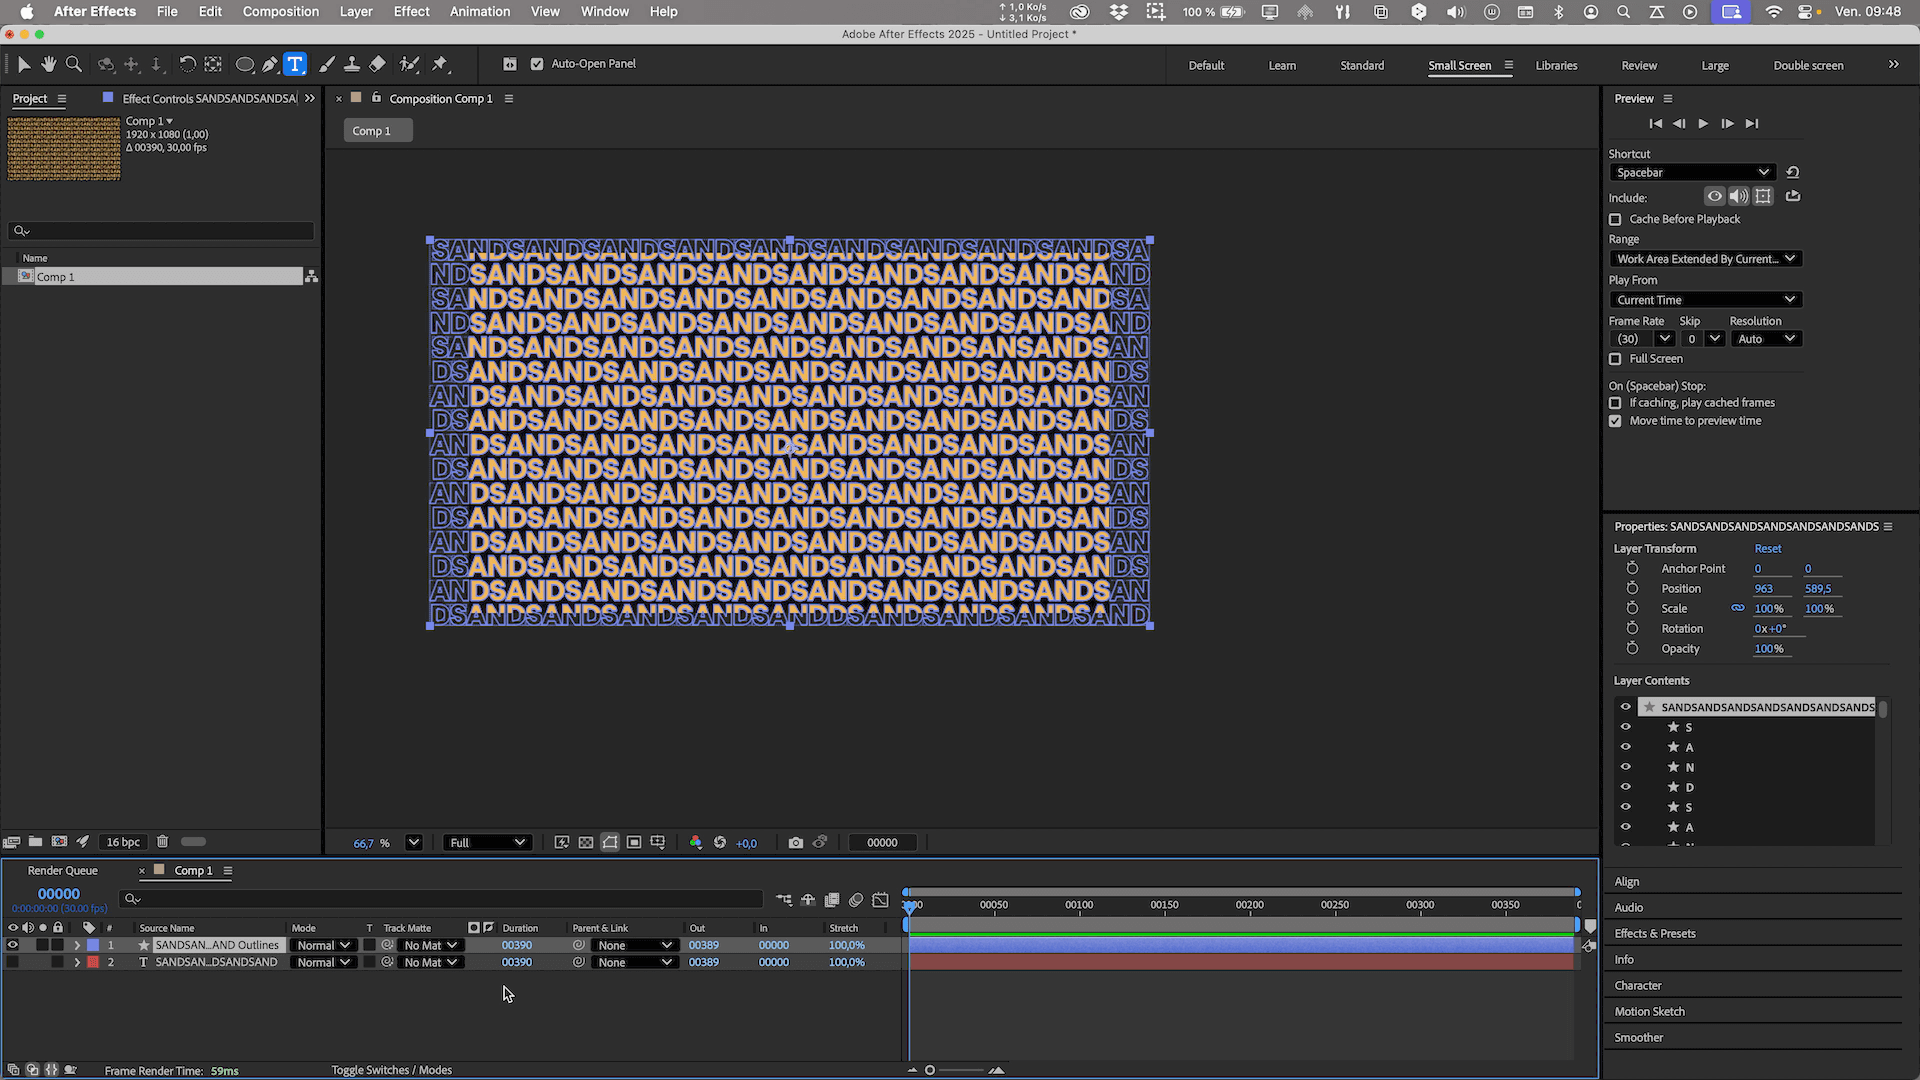
2. Background Pattern Create a text layer with a word repeated to cover the entire surface.
3. Cleanup Remove unnecessary empty lines and adjust the color to get a "sand" tone.
4. Conversion (Crucial) Convert the text layer to Shape Layers so Newton can detect them. Delete the source layer.
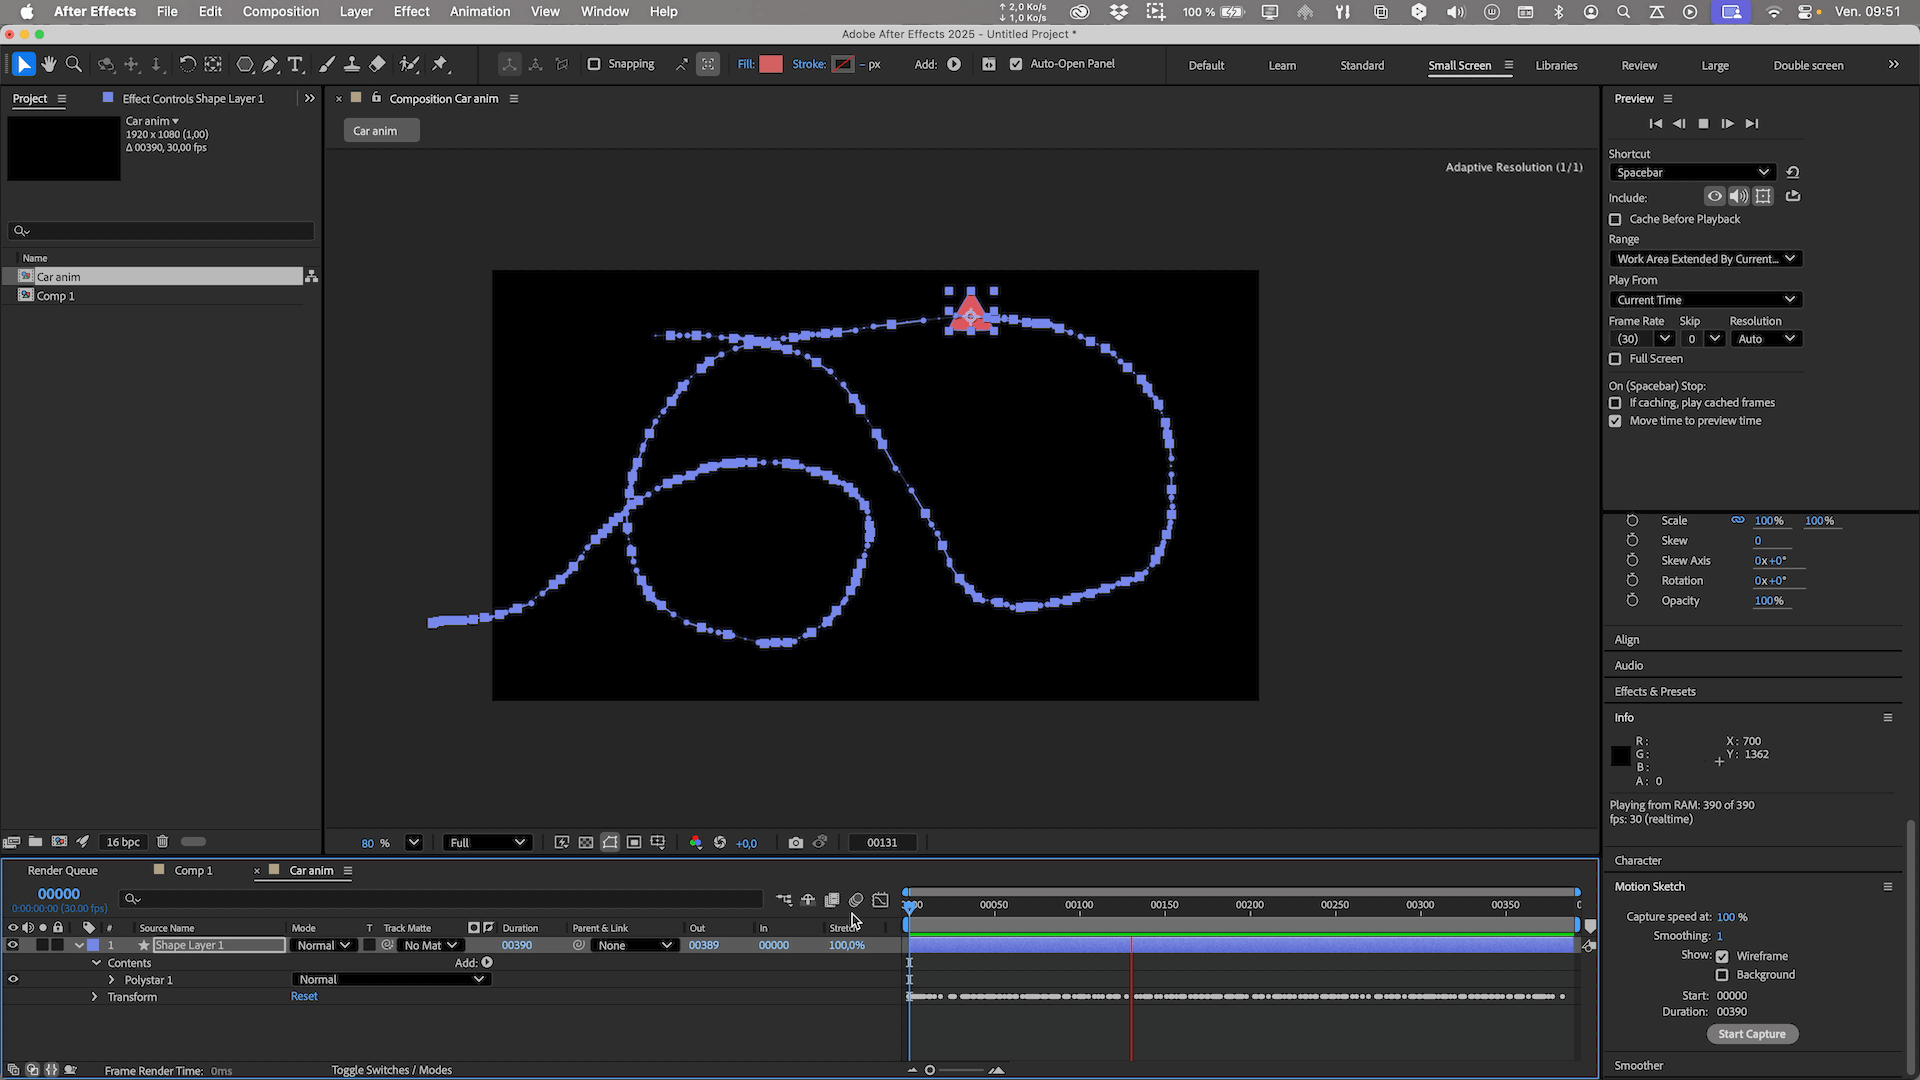
1. Guide Comp Create a new composition with a simple triangle as a visual guide.
2. Organic Path Use the Motion Sketch tool to draw the car's path by hand.
3. Smoothing Apply the Smoother with a tolerance of 10 to smooth out the curve.
4. Orientation Enable auto-orientation (Orient Along Path) on the triangle and adjust its rotation (90°) so it follows the line.
1. Setup Launch Newton. Set Gravity to 0.
2. Guide Triangle Set it to Kinematic mode so it follows the AE animation.
3. Car (Physics) Add a layer for the car. Set it to Dynamic.
4. Joint Select the car and the triangle, then add a Weld Joint. Place the joint's anchor point between the front wheels.
5. Drift Tuning In the Joint settings, increase Tension and especially Damping towards 1.
6. Export Export the animation to After Effects.
1. Copy Animation Copy the car animation (from the previous section) into the "Text" composition.
2. Separate Letters Launch Newton and accept to separate the letters into independent layers.
3. Centering Back in AE, center the anchor points of all letters. Relaunch Newton, do a "Reset Body Transform" on the letters.
4. Collision Settings Configure the bodies as follows:
5. Stabilization To prevent letters from sliding like on ice:
6. First Result At this stage, the letters are displaced and stay in place. It's a valid base, but we will improve it for the final version.
For the final animation, we want the letters to return to their initial position. We will modify the scene to achieve this effect.
1. Switch to Elastic Mode Change the letter type to Aematic (they act as if attached by elastic bands).
2. Visibility Tip Hide the white links (visuals) in the options to see more clearly.
3. Return Tuning Strongly increase the Aematic Damping to slow down the letters' return. The goal is to avoid an overly violent spring effect.
4. Comparison (Snapshot) Create a new Snapshot of this version. You can now instantly switch between the previous dynamic scene and this new version to compare effects and choose the best one.
5. Final Render Once satisfied with the return movement, launch the simulation render to apply it in After Effects.
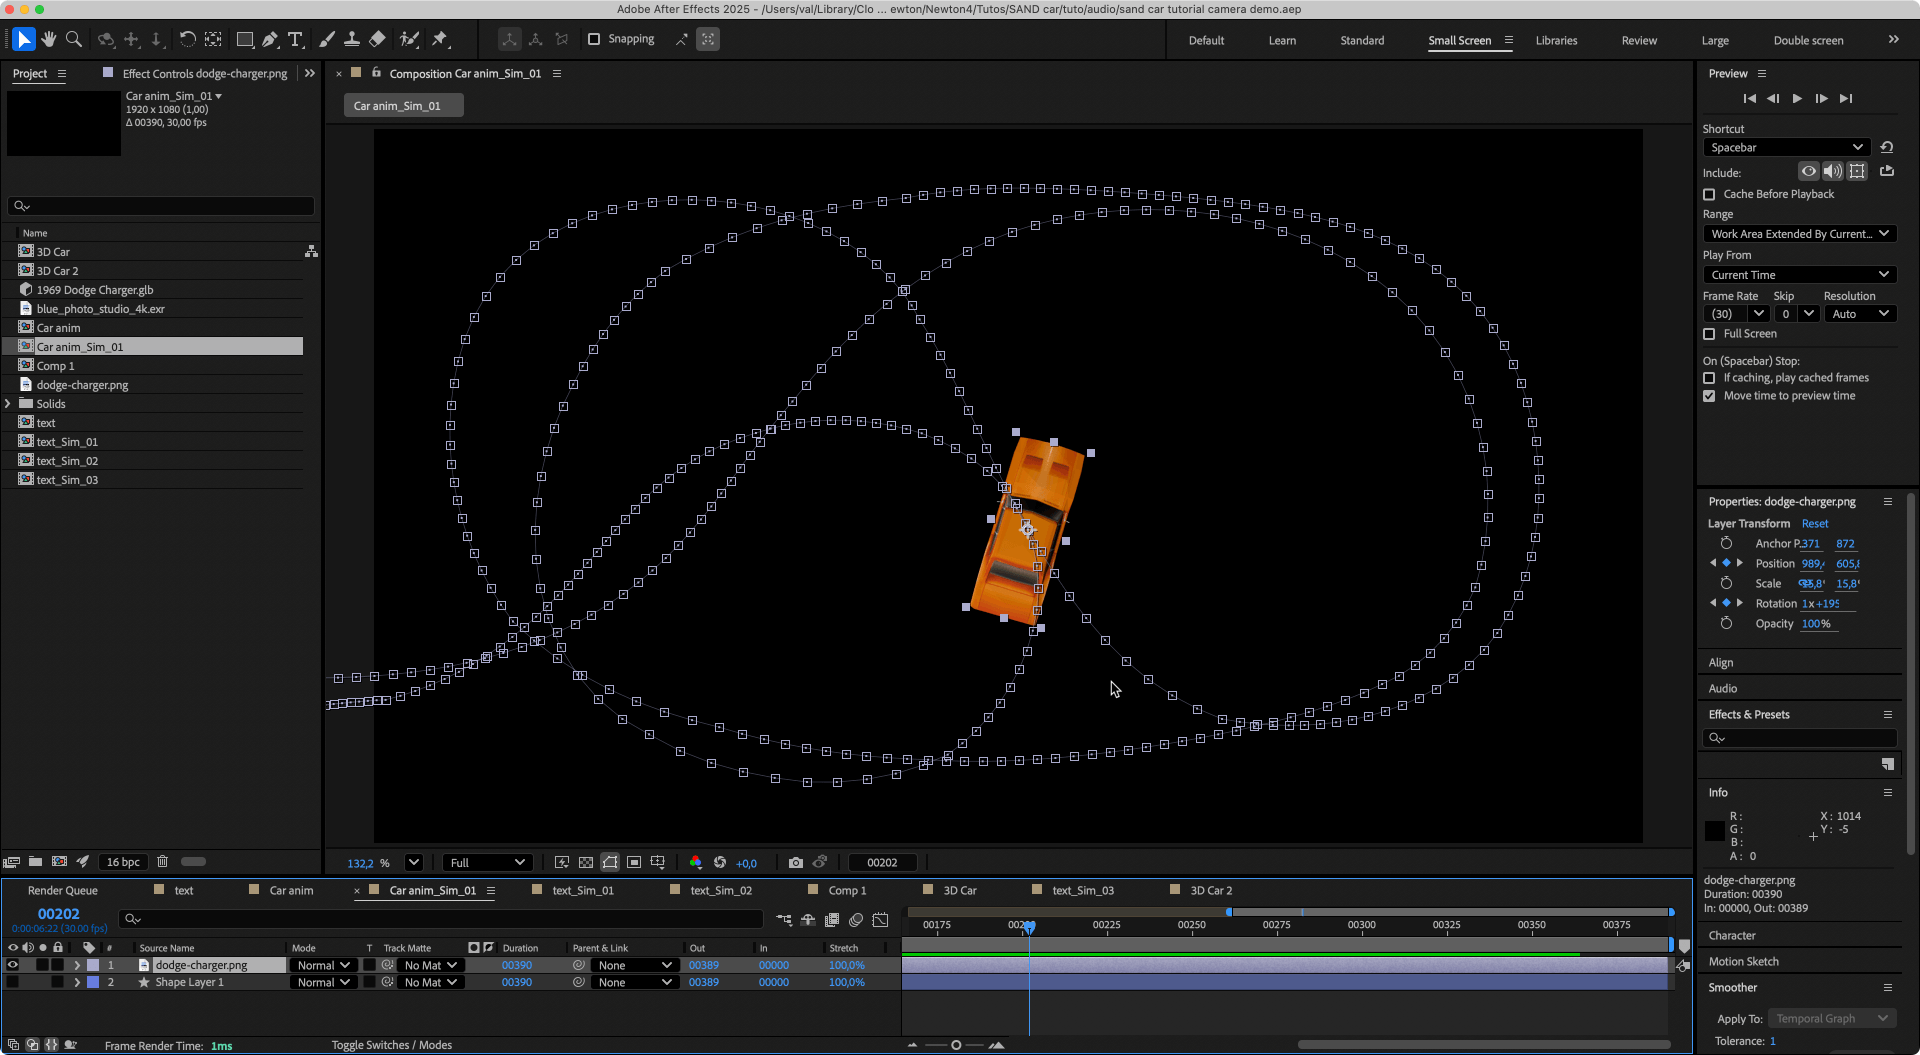
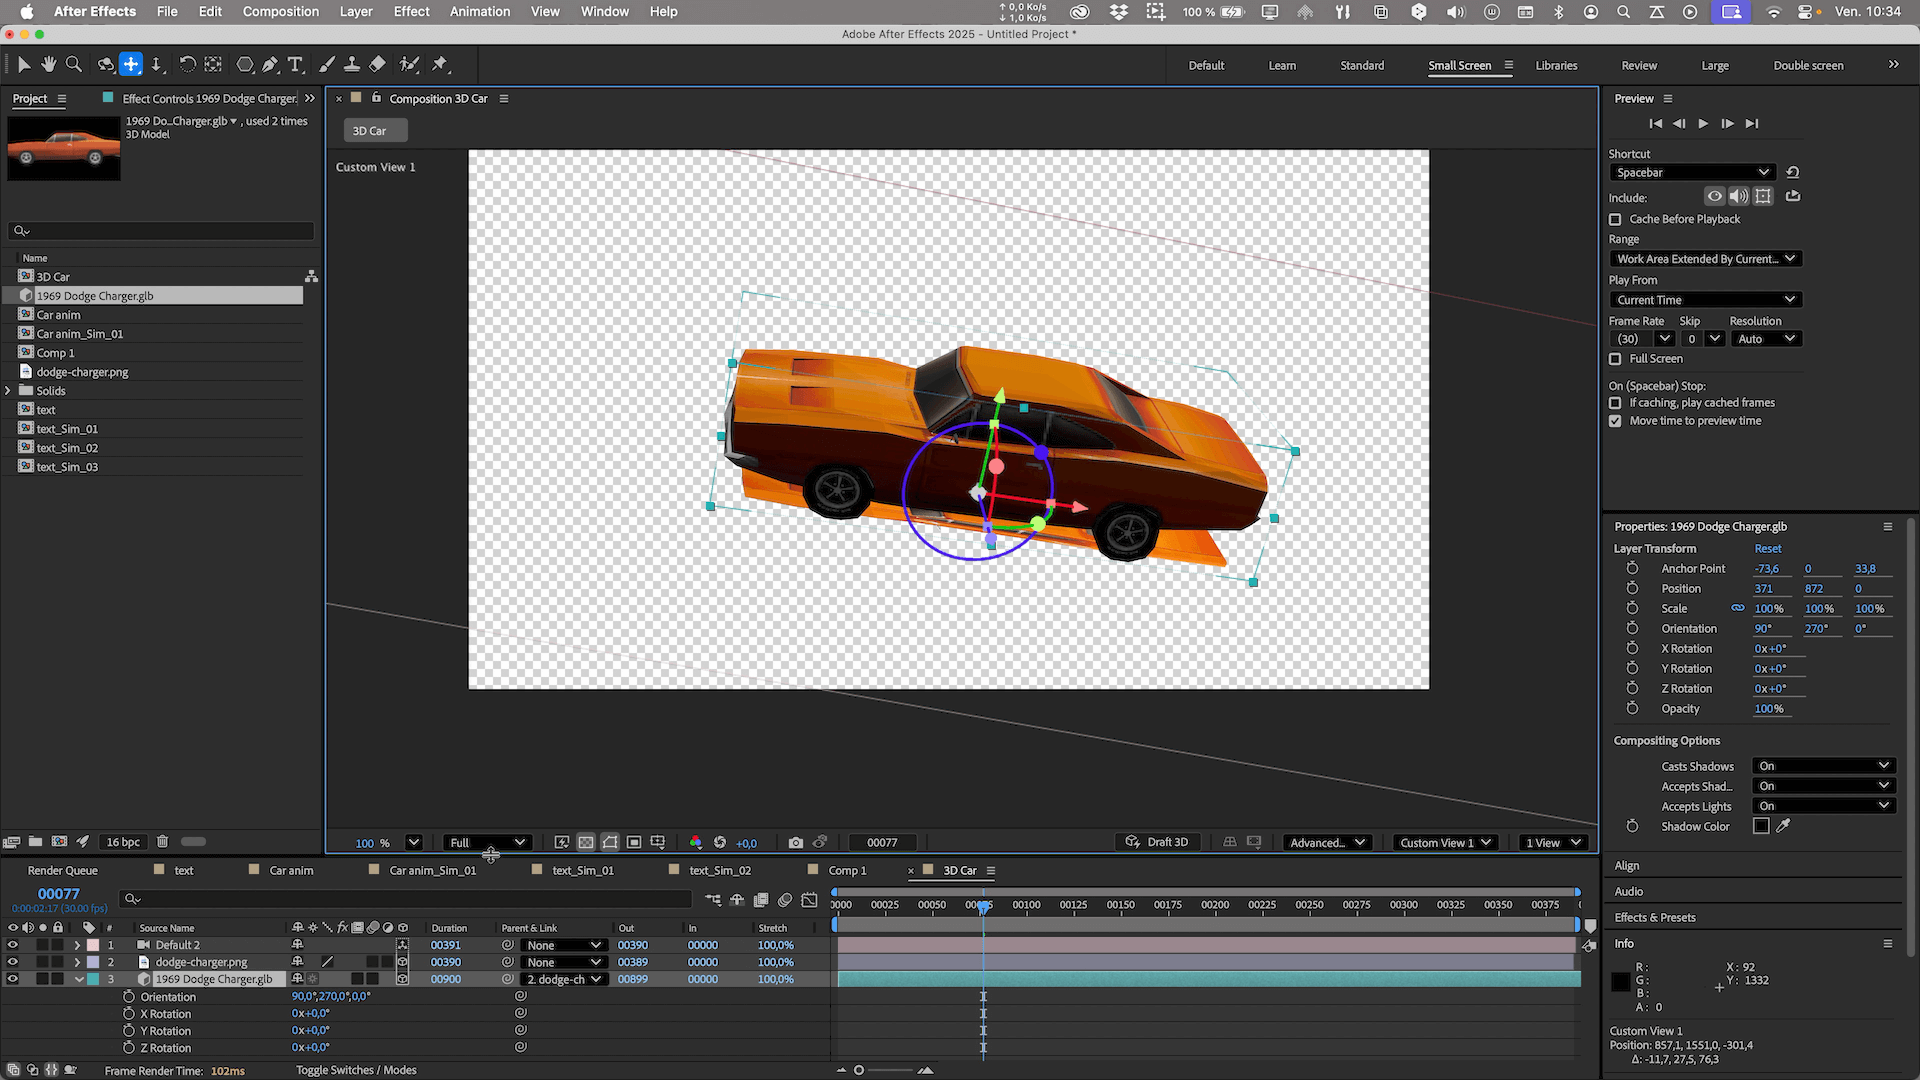
1. Import Import your 3D car model (.glb/.gltf/.obj).
2. Composition Create a "3D Car" composition and change the renderer to Advanced 3D.
3. Setup Copy the 2D car image (the one used for physics) into this comp and drag the 3D model into it.
4. Linking (Parenting) While holding Shift, parent the 3D model to the 2D layer.
5. Adjustments Place the anchor point at the wheel/ground contact level. Adjust scale and orientation to perfectly match the guide.
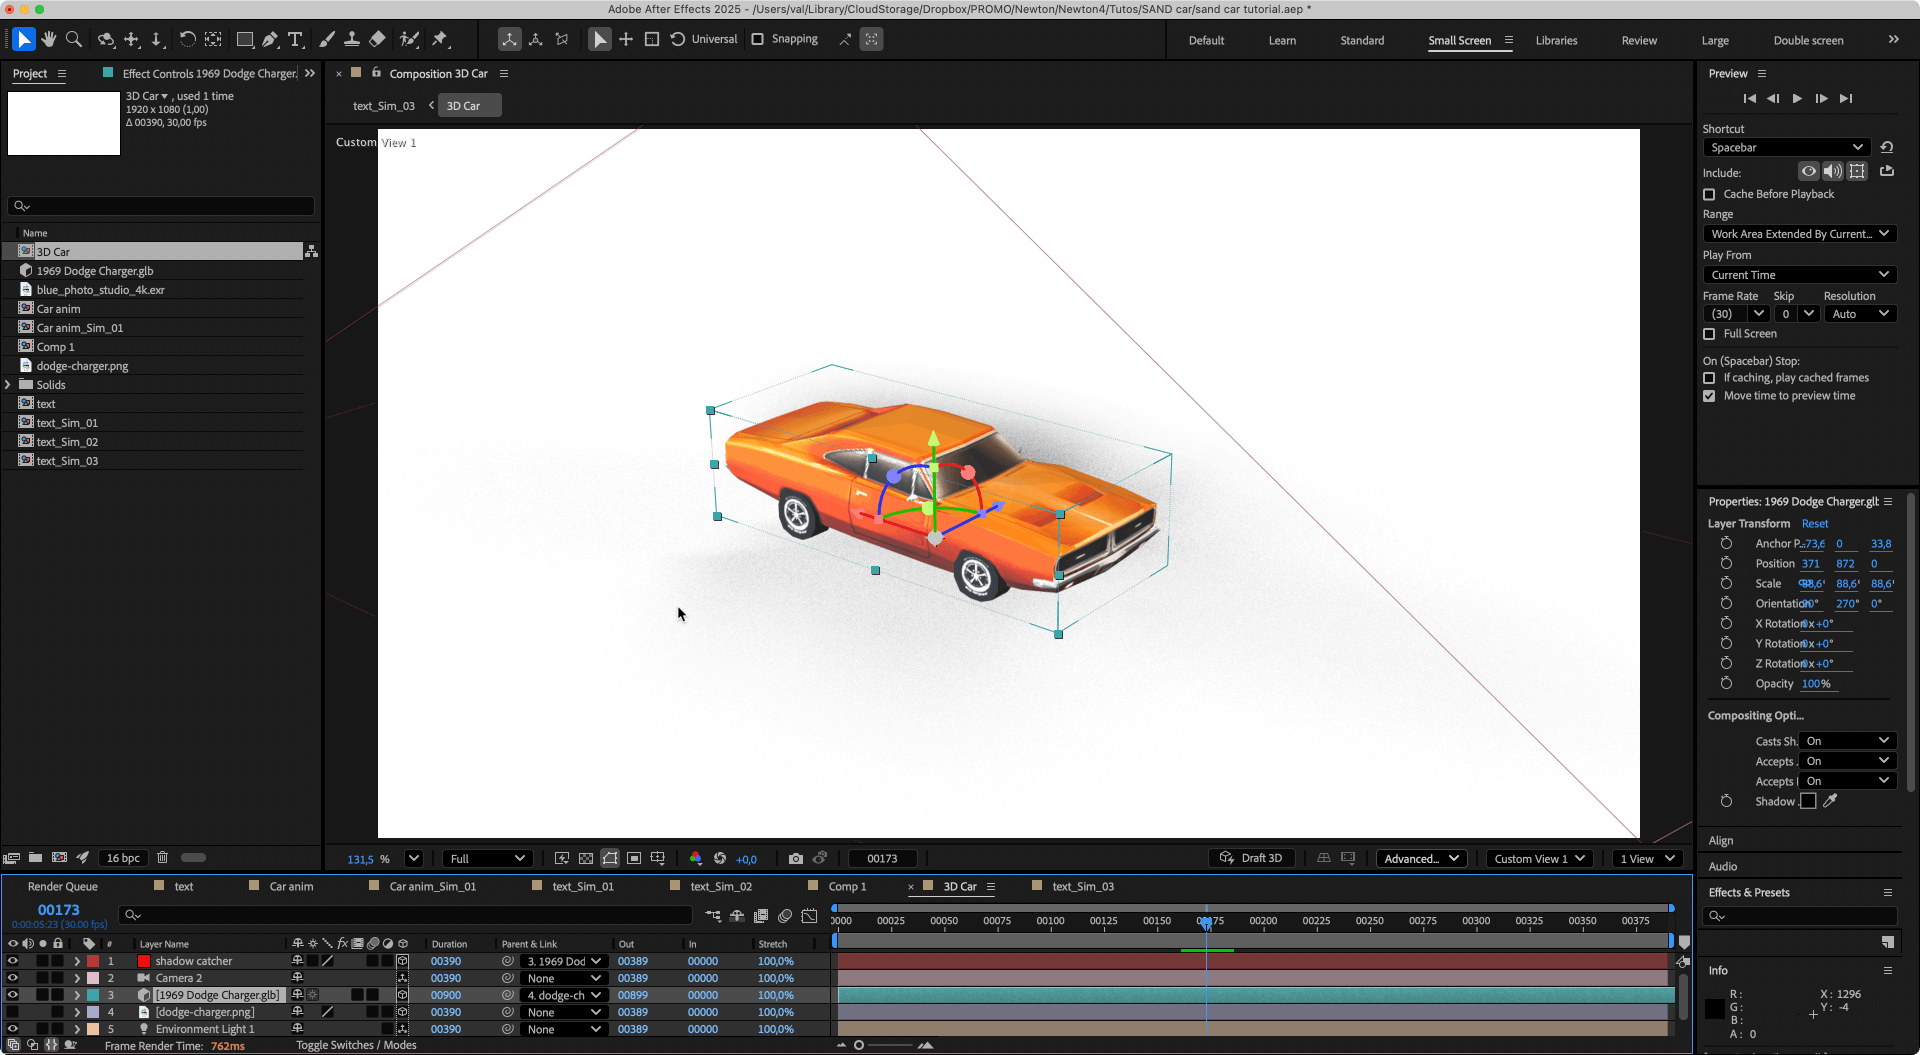
1. Shadows Create a Solid for the ground (Shadow Catcher). Set the Surface Options:
2. Light Import a 360° HDR image. Create an Environment Light and assign the HDR map as the source.
3. Scene Reorientation If the lighting doesn't match, create a Null Object. Parent everything (except the already linked 3D model) to the Null.
4. Optimization Link the "Shadow Catcher" solid to the 3D model so it follows the car. Apply a mask (ellipse) with feathering on the shadow to limit it around the car.
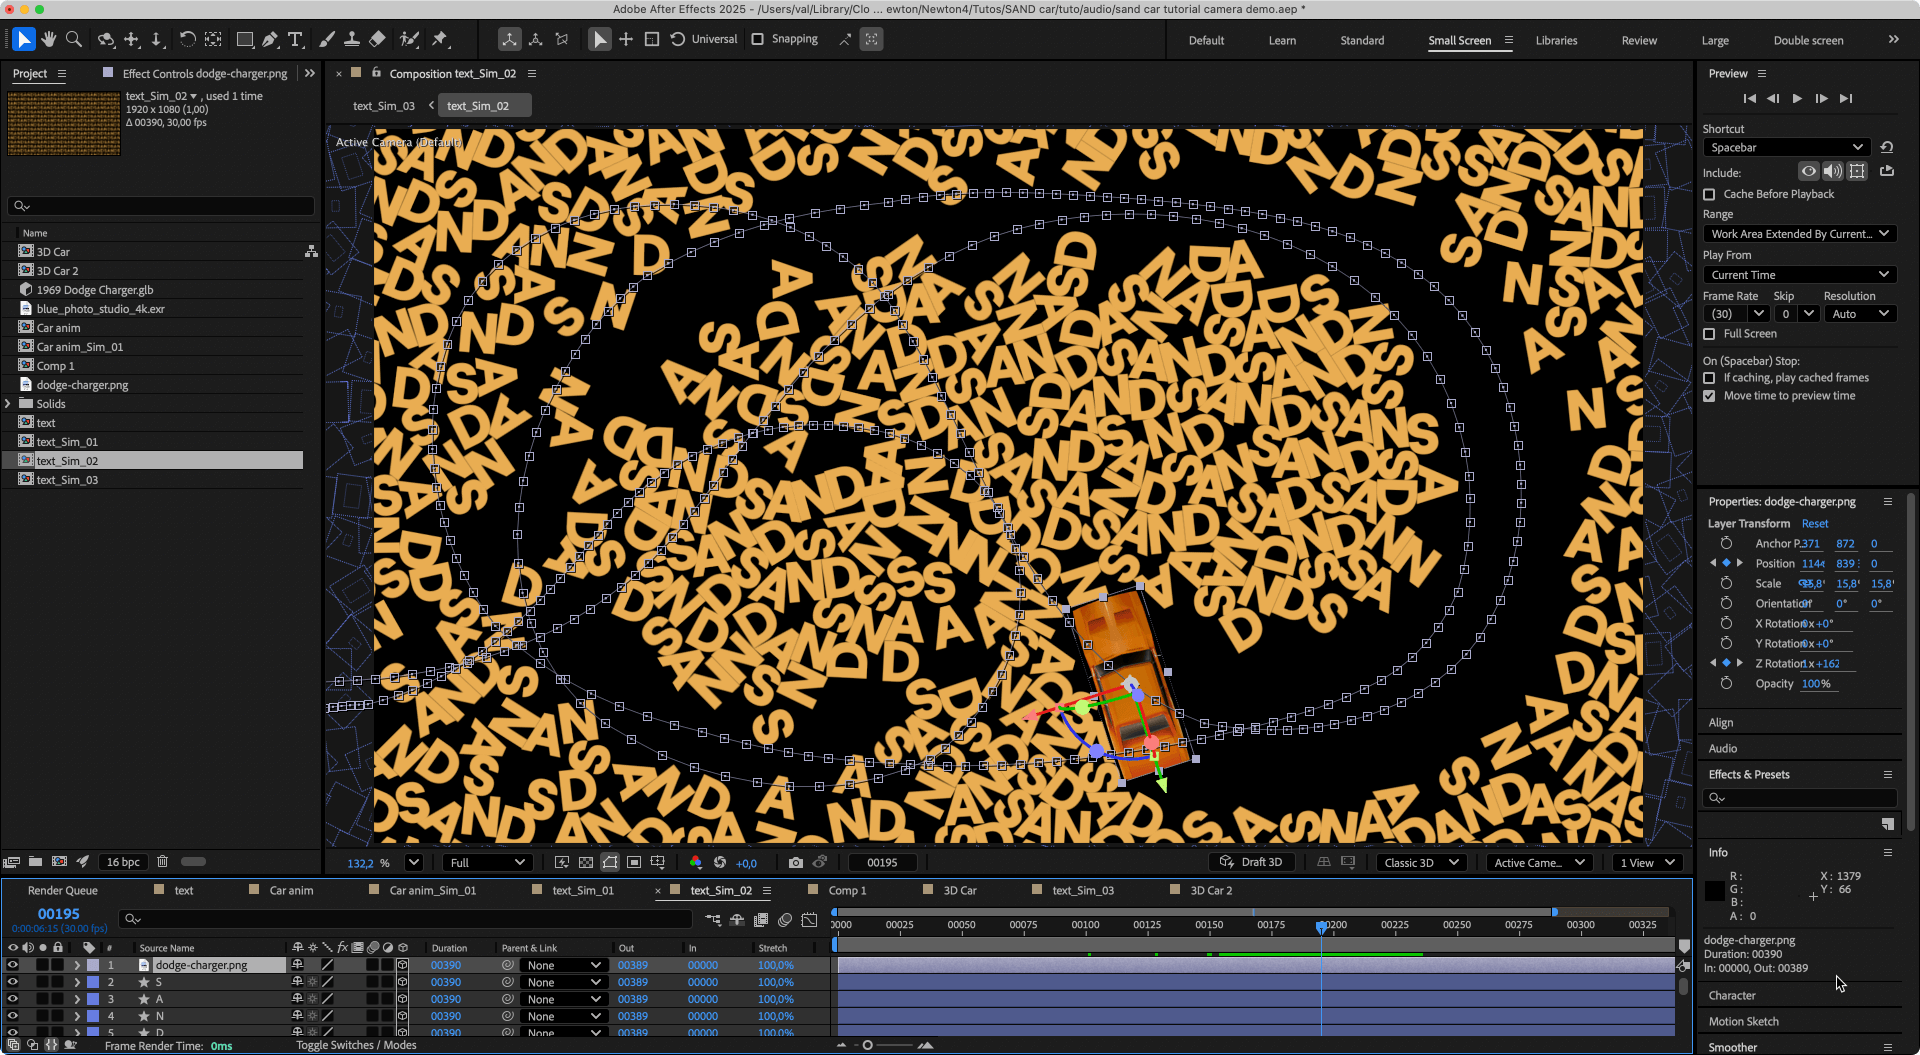
1. Import Import the "3D Car" composition into the main composition (the one with the text).
2. Synchronization (The Magic Step) Create a camera in the main comp and animate it.
Final Tip: To gain efficiency when editing the different sequences, a little tip: place the master camera directly in one of the compositions (text or 3D model) instead of leaving it in the main composition. This allows for much faster previews to set up the shots, as AE doesn't need to constantly calculate links between compositions.

This project illustrates the efficiency of a hybrid workflow. On one hand, Newton is used to handle all the physical complexity in 2D, including precise collisions and element inertia. On the other, After Effects' Advanced 3D engine takes over to ensure the photorealistic rendering of the vehicle. The secret of this technique lies in the bridge created between 2D and 3D thanks to camera synchronization via property links, allowing the two worlds to merge perfectly seamlessly.
Feel free to experiment with these techniques. Share your creations and questions on our Discord server !