In this tutorial, we’ll combine design, animation, and physics to create a visually striking typographic system. Using Newton, Motion Sketch, expressions, and optional tools like Pastiche, you’ll learn how to simulate magnetic forces, control connections, and build elegant animation setups that remain fully editable.
What You'll Learn:
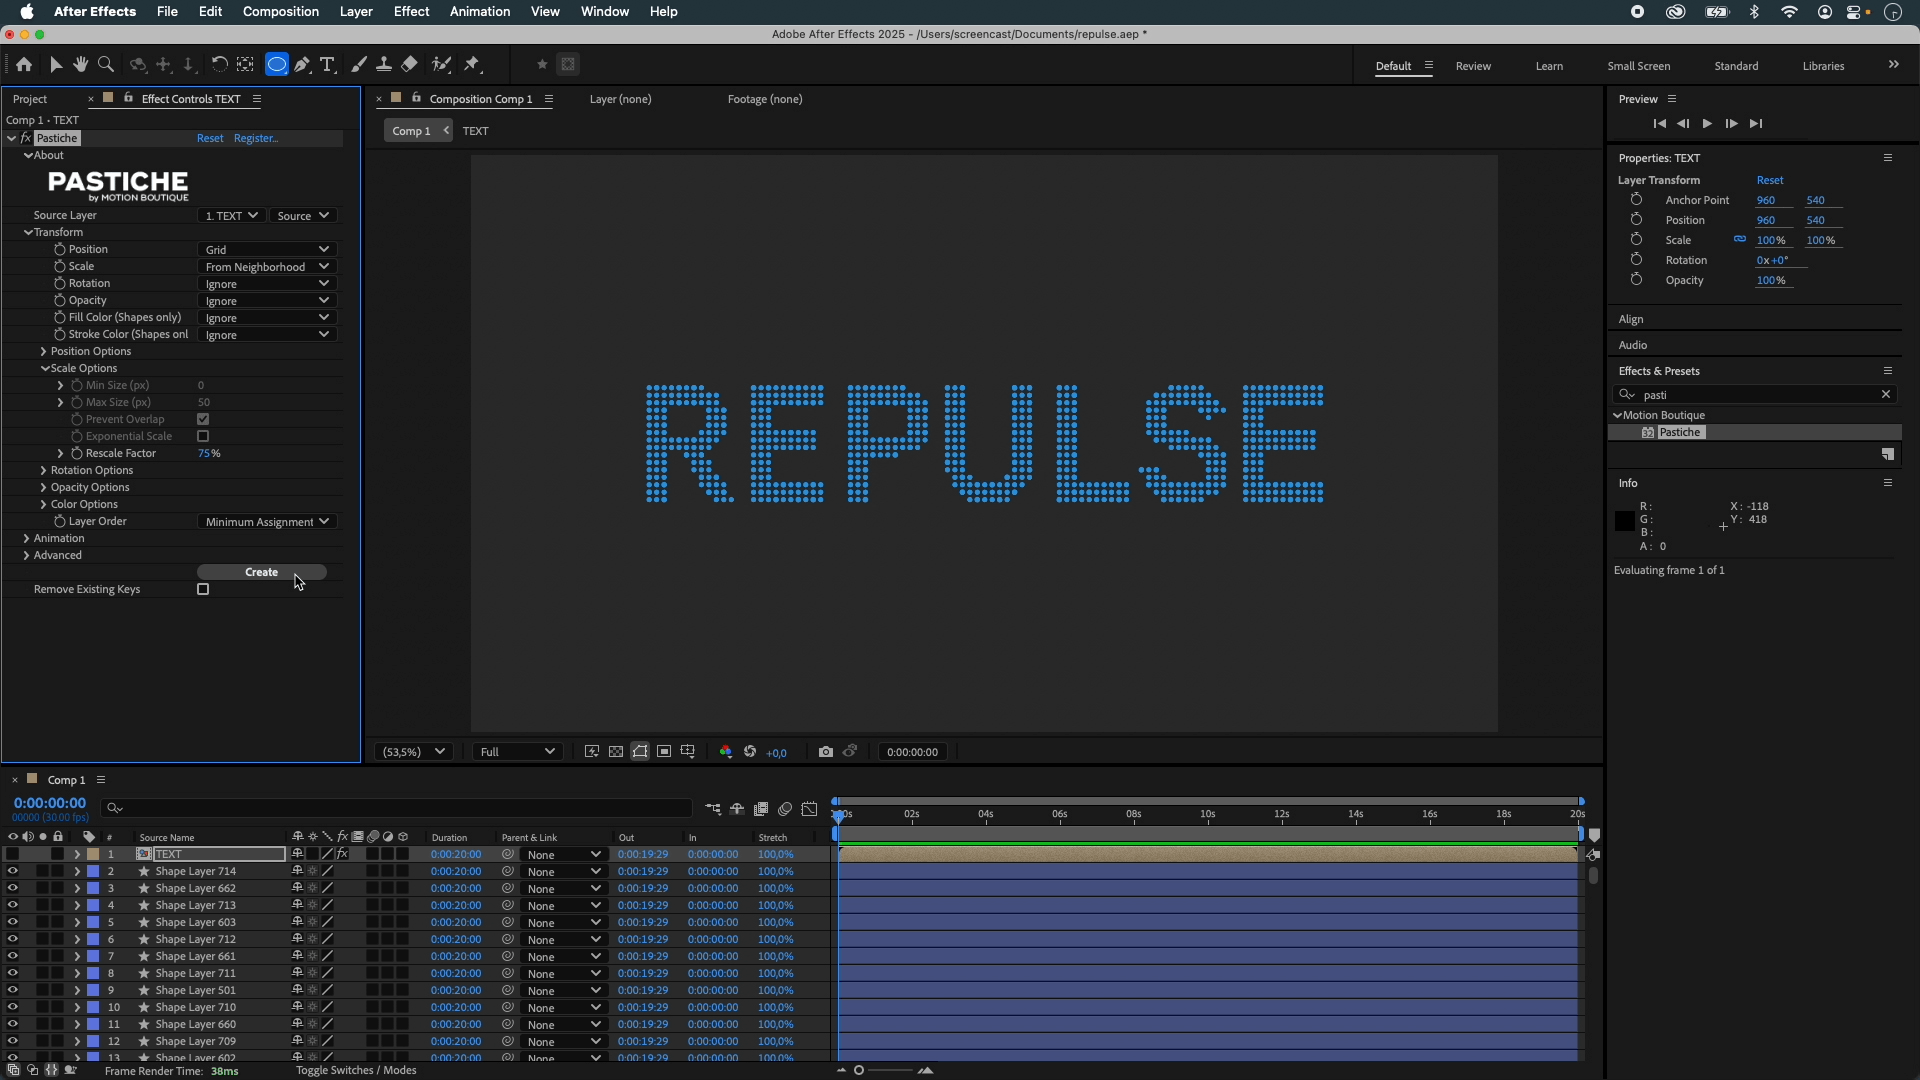
- Creating Typographic Structures: Import your pre-separated design directly into After Effects. Alternatively, use Pastiche to generate complex typographic layouts by arranging hundreds of simple shapes—like circles—based on the transparency (or the luminance) of a source layer. Optionally, use tools like MOBO_Utils to quickly duplicate and organize layers, especially if you're working with large volumes of elements (around 700+ layers for optimal clarity).
- Animating with Newton: Apply Newton for magnetic interactions and tethered animations. Understand object types such as Kinematic and AEmatic for natural motion. Animate the tension of AEmatic bodies to release elements from their anchored positions and allow them to behave like dynamic objects. Fine-tune physical behavior by adjusting damping and tension settings, and organizing objects using collision groups.
- Adding Dynamic Connections: Create flexible visual connections using expressions within After Effects. Efficiently duplicate and manage line properties using "Copy with Property Links."
Step-by-Step Breakdown
Step 1: Typography Setup
- Import your design directly into After Effects with separate layers.
- Alternatively, since Pastiche is one of our in-house tools, we’ll use it here to generate the layout directly within After Effects, based on the transparency of a source layer.
- Duplicate your shape elements (circles or other objects) to create clear typography — in this example, around 700+ layers for clarity.
- Adjust scale and spacing using Pastiche’s Rescale Factor to achieve a polished look.
- Animate a single object using Motion Sketch to define the magnetic source’s path.
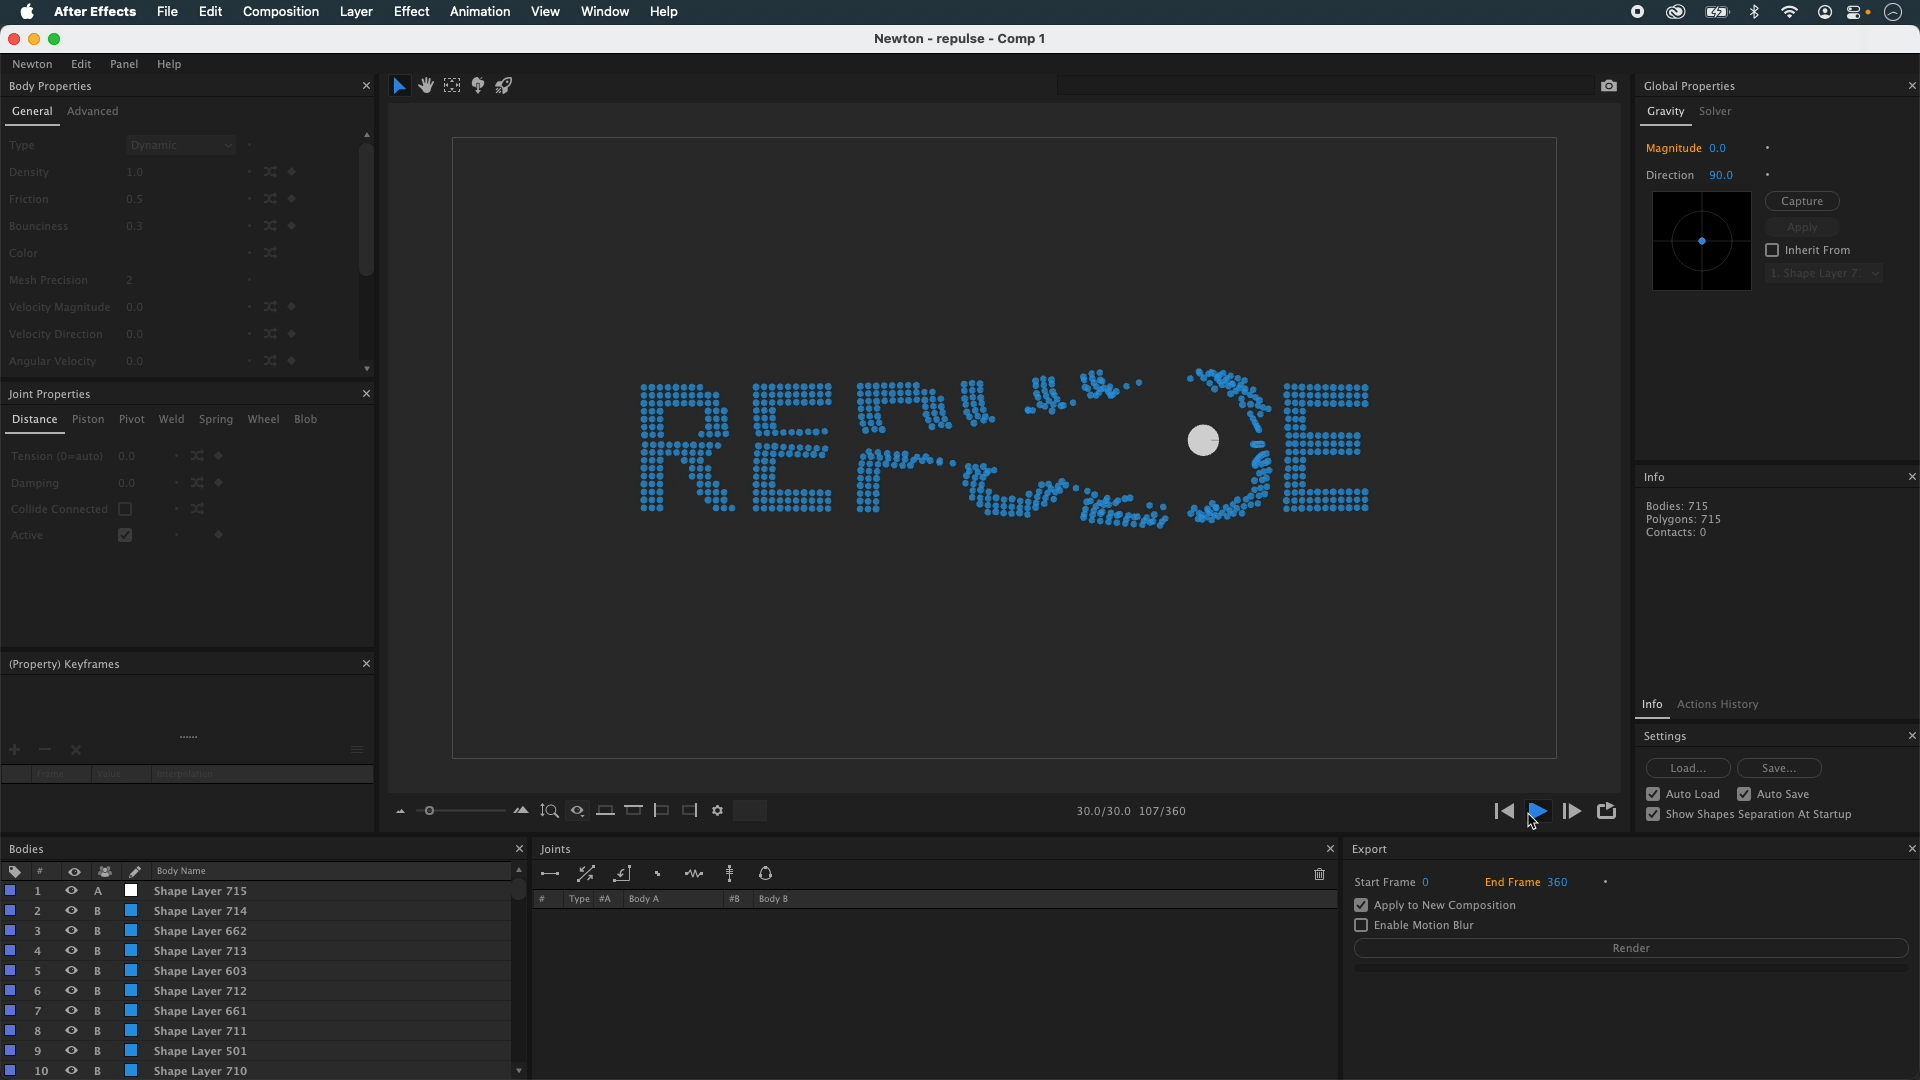
Step 2: Newton Physics Simulation
- Launch Newton and disable gravity to simulate a zero-gravity environment.
- Set your animated object as Kinematic so it follows the Motion Sketch path.
- Use AEmatic objects for the elements that need to return smoothly to their original positions.
- Adjust damping, tension, and collision groups to fine-tune the simulation.
- Animate AEmatic tension within Newton to dynamically release the elements at the right moment.
Step 3: Rendering and Finalizing in After Effects
- Render your Newton simulation and import it back into After Effects.
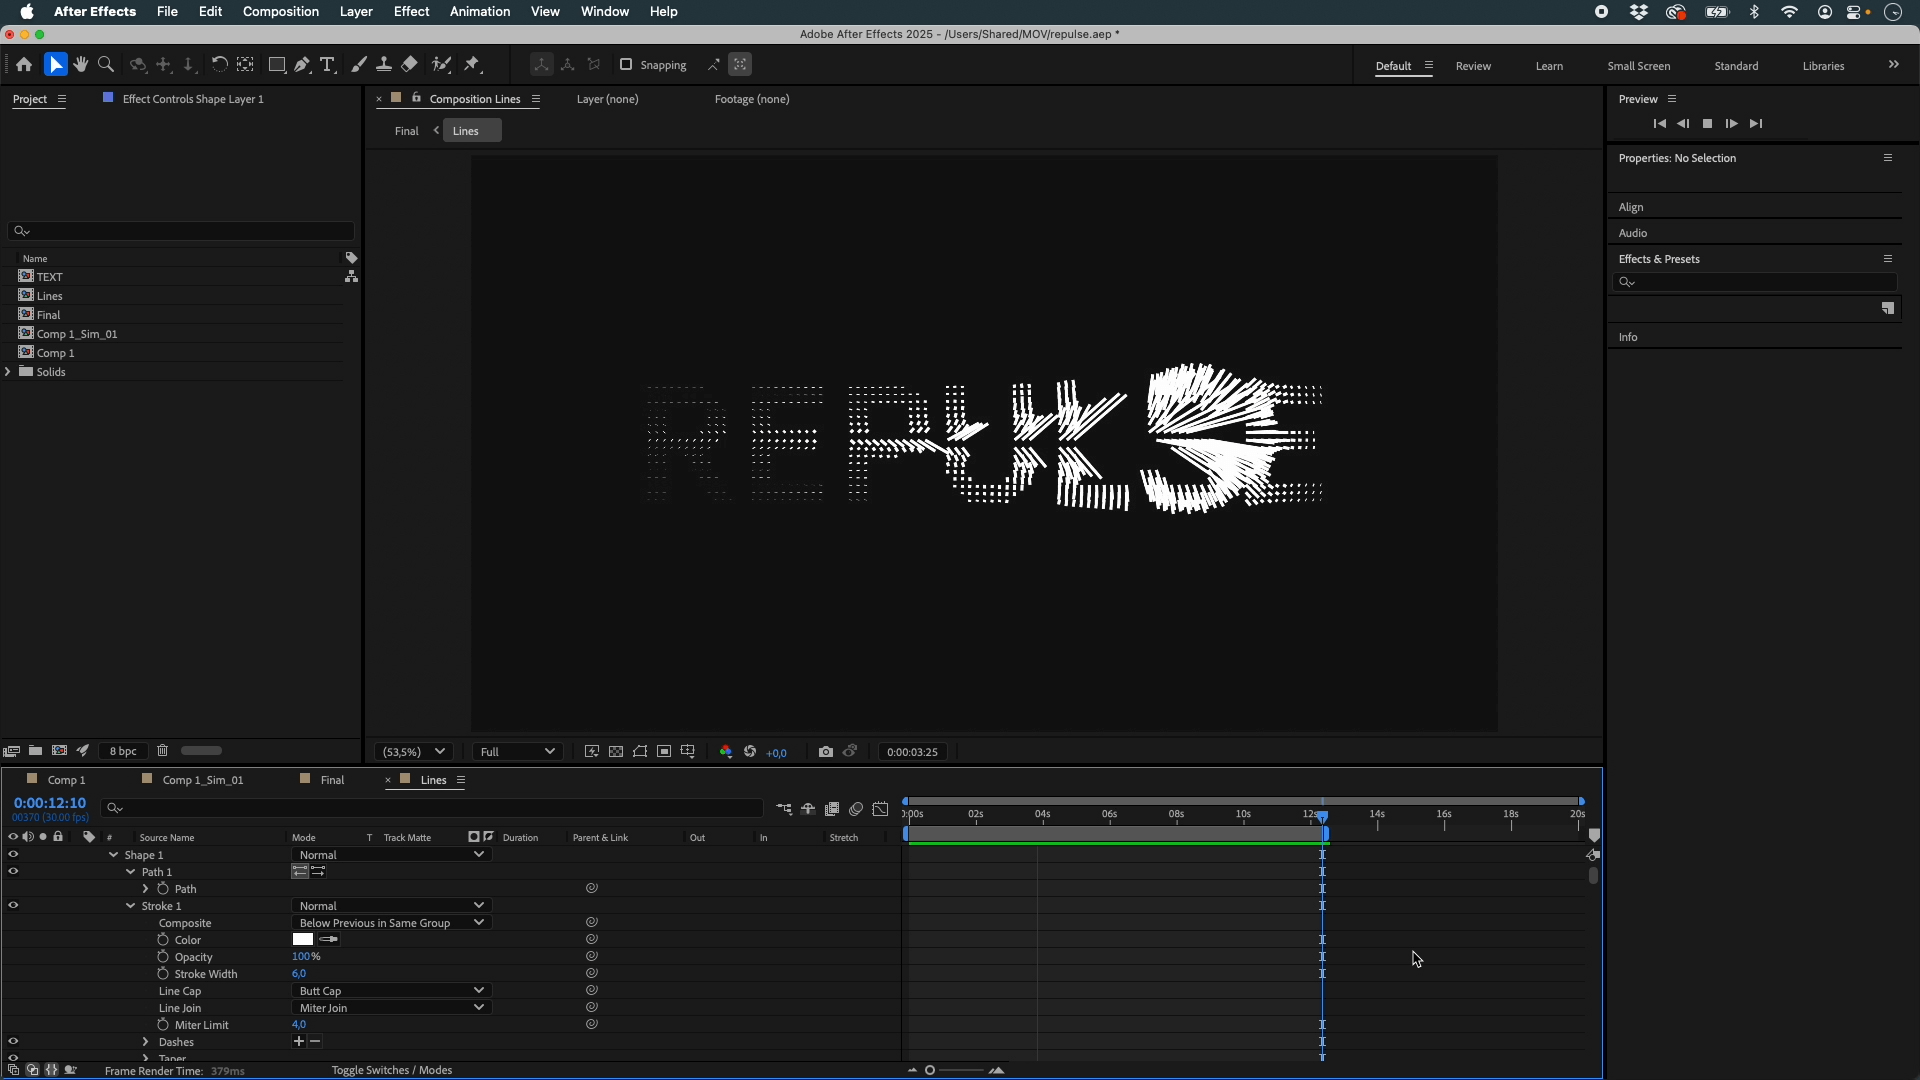
- Create a new composition dedicated to building connecting lines.
- Create a shape layer containing a line with two vertices.
- Apply the provided custom expression to the Path property of the shape layer to automatically connect matching elements between compositions.
// Names of the source comps
var compA = comp("Comp 1");
var compB = comp("Comp 1_Sim_01");

// Target layer index = index of this shape layer (adjust if offset is needed)
var targetIndex = thisLayer.index;

// Safety check to avoid errors
if (targetIndex > compA.numLayers || targetIndex > compB.numLayers) {
    value; // keep the original path as is
} else {
var layerA = compA.layer(targetIndex);
var layerB = compB.layer(targetIndex);

var p1 = fromCompToSurface(layerA.toComp(layerA.anchorPoint));
var p2 = fromCompToSurface(layerB.toComp(layerB.anchorPoint));

var origPath = thisProperty;
var points = [p1, p2];
var inTangents = origPath.inTangents();
var outTangents = origPath.outTangents();

createPath(points, inTangents, outTangents, false);
}
- Don’t forget to update the composition names inside the expression to match your own project.
- Duplicate the lines efficiently using Copy with Property Links to maintain consistency across all connections.
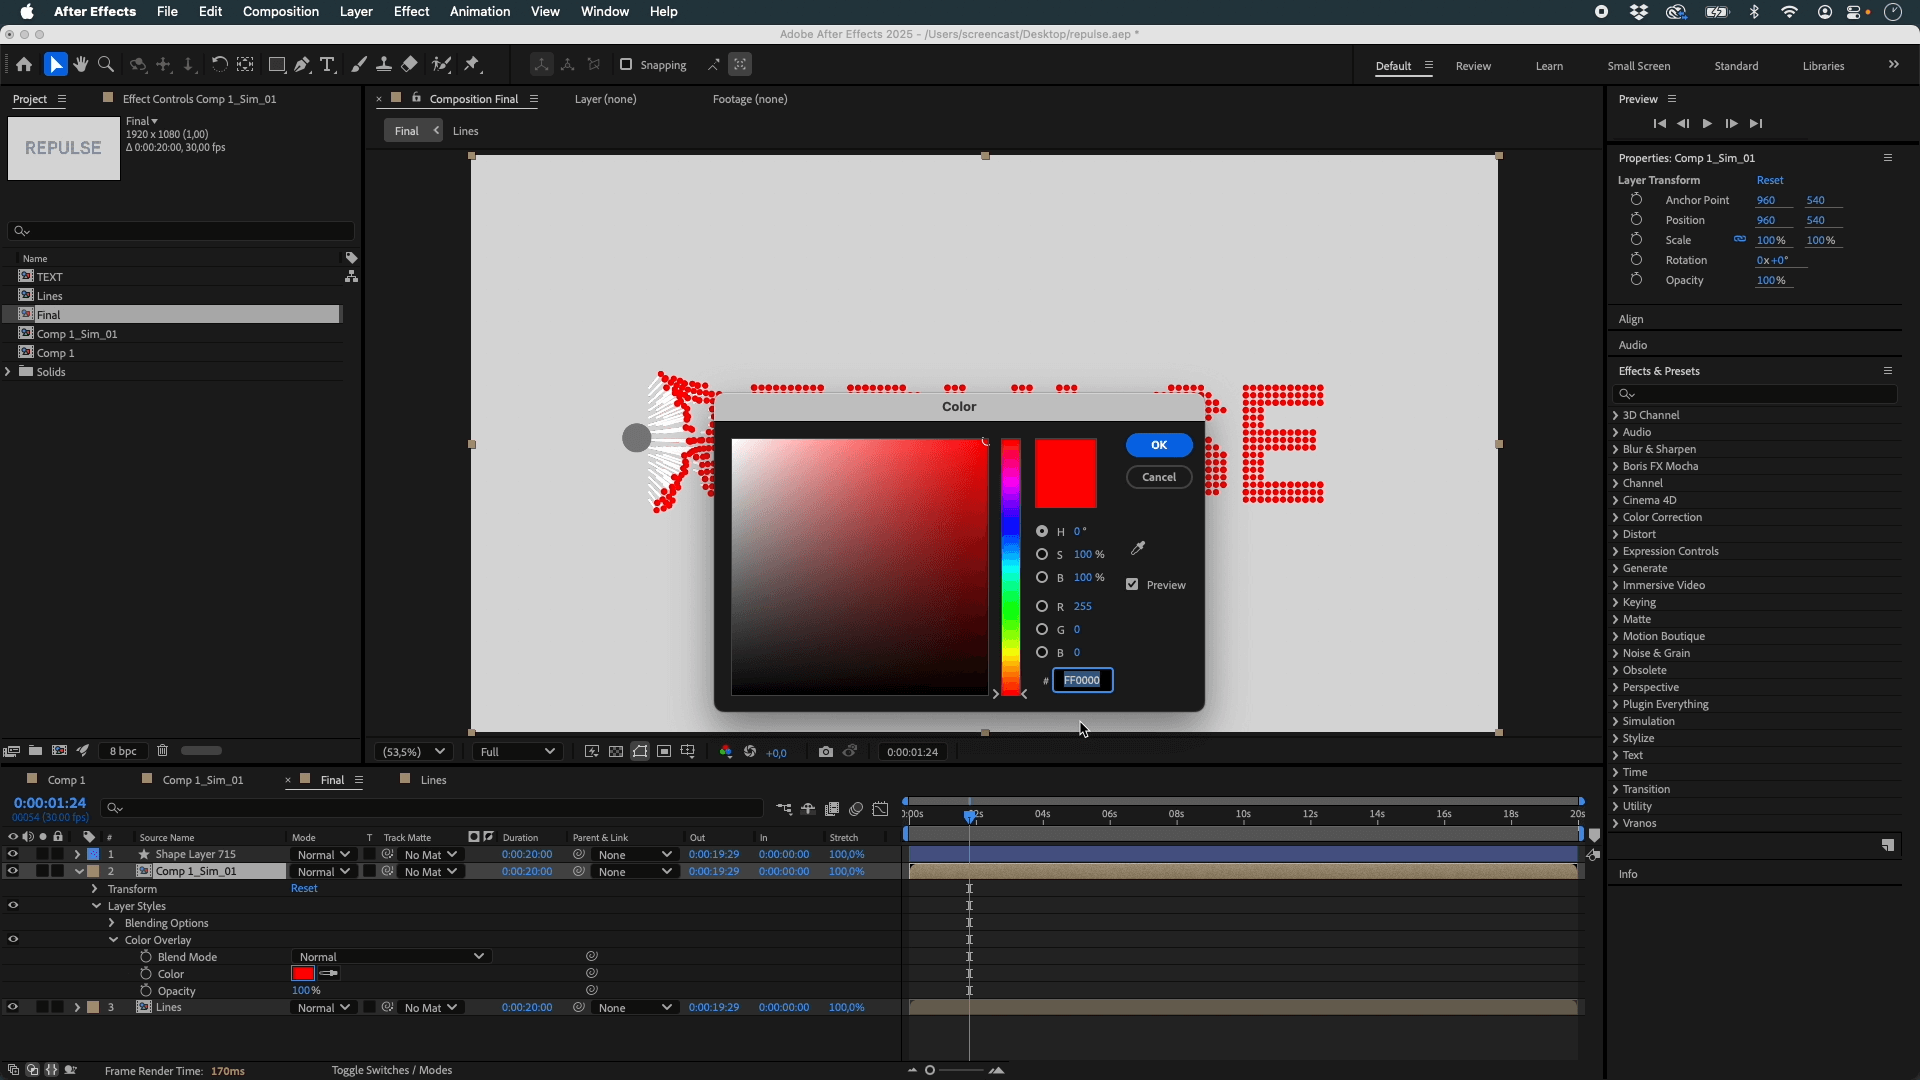
Step 4: Polishing and Customizing
- Adjust the design (color, thickness, stroke style, etc.) from a single linked layer.
- Preview and refine your final animation for maximum visual impact.
Why You'll Love This Technique:
This workflow enables you to achieve sophisticated animations without complex manual adjustments. The use of Newton’s physics-based interactions combined with simple expressions and clever layering techniques provides both flexibility and powerful creative potential.
Ready to try it yourself? Dive into the tutorial and unlock new possibilities in dynamic typography animation!
