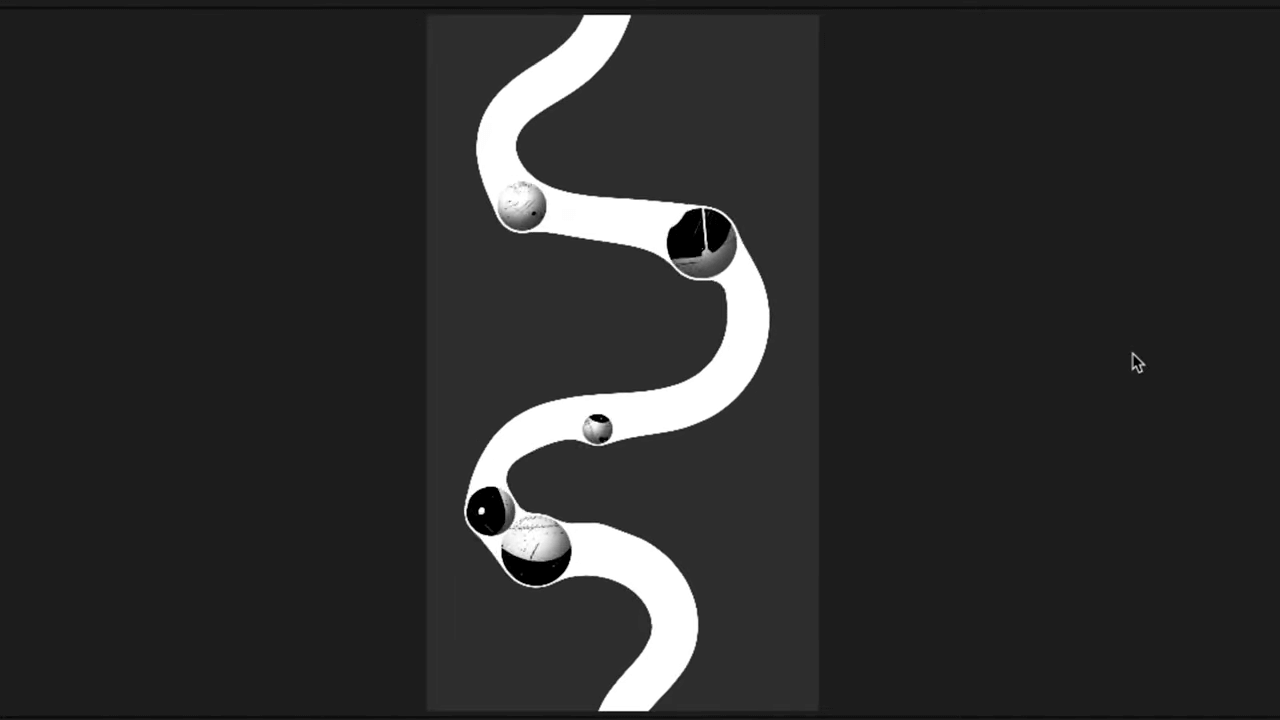
Today, we're diving into a step-by-step guide on how to dynamically animate a flexible tube in After Effects using Newton. Whether you're envisioning a vein, a flexible tube, or even a stomach, this tutorial will show you how to make objects, like marbles, move through the tube for a smooth and realistic animation. Let's get started!
Original thread on Reddit by u/Agreeable_Meal8624 : Its currently only a vision in my head, but im imagining the balls moving down the curve, and the curve stretching as they bunch up in the beginning, and slowly progressing ... At first i thought of Newton, its helpful for the movement of the balls, but not so much the stretching of the tract line ... i really dont wanna do it manually ..."
Download the project + Newton settings
Need to download our tools or get a trial version?
You're not alone if you need help! Open a support ticket or join our Discord server!
Step-by-Step Guide
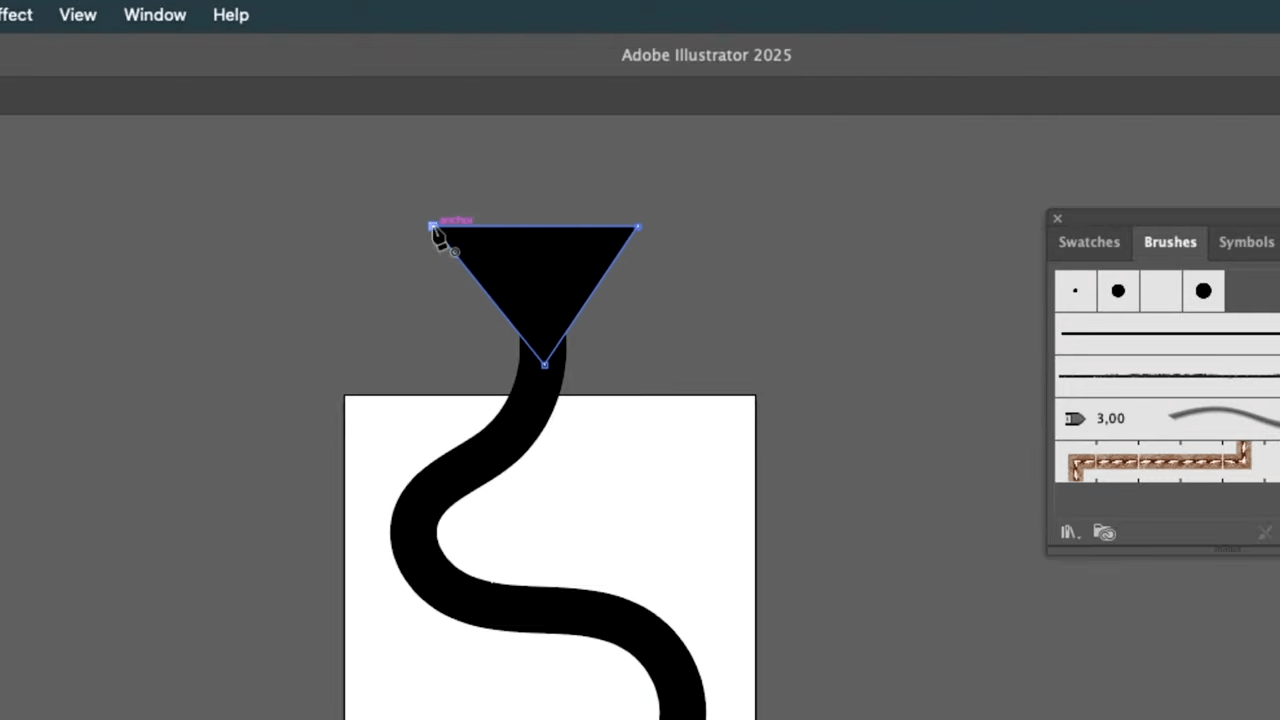
Step 1: Create Your Tube
- Design your tube in Illustrator using the brush tool for a smooth stroke.
- Expand the stroke and use the Expand Appearance function to create a single path.
- Create a funnel shape and merge it with your stroke using the pathfinder.
- Add a bottom to your tube, cut off the rounded end, and remove it with the pathfinder.
- Save your Illustrator file and import it into After Effects.
Step 2: Import and Set Up in After Effects
- Import your Illustrator file into After Effects and create a new composition.
- Convert the Illustrator file into shape layers within After Effects.
- Clean up any unnecessary shapes and adjust the color of your tube.
Step 3: Design Your Marbles
- Import a texture to create the marbles and use the ellipse tool to create circular masks.
- Ensure the mask is the right size, slightly wider than your tube.
- Duplicate the marbles to create different sizes and center the anchor points.

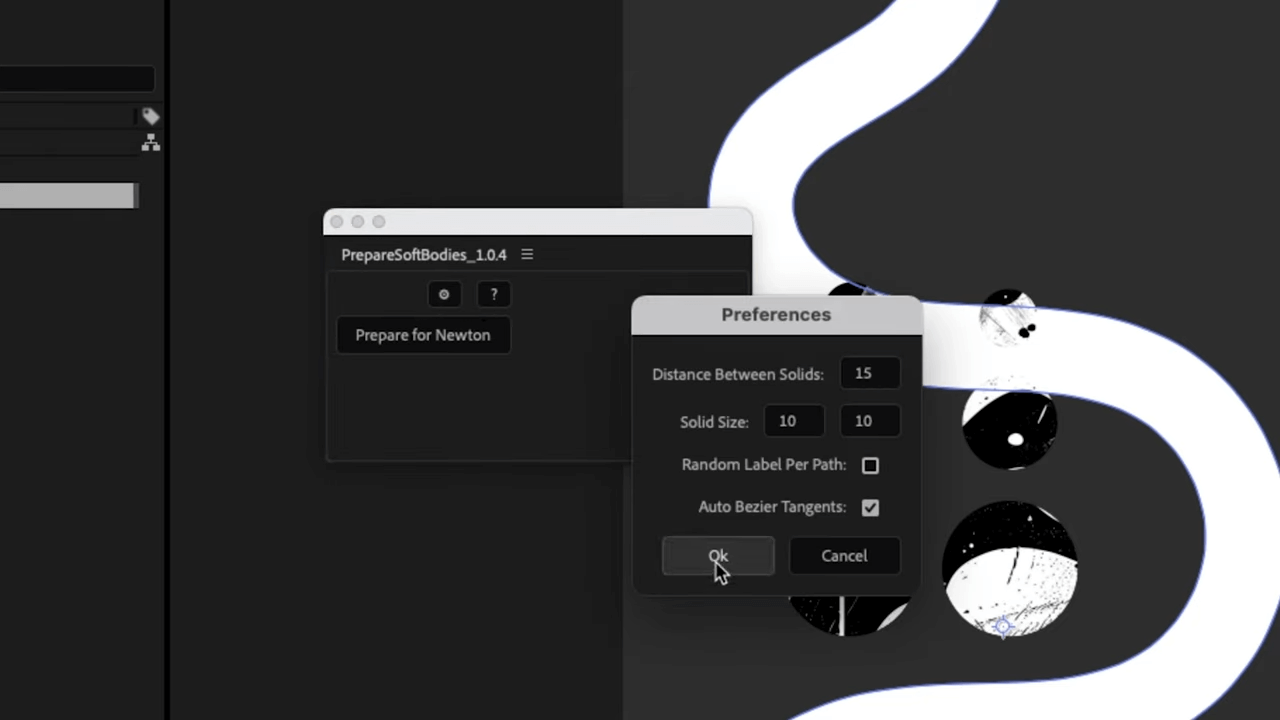
Step 4: Prep Your Tube for Animation
- Use the Prepare Soft Body's script to get your tube ready for animation.
- Enter the necessary values in the preferences and click on "prepare for Newton."
- Rearrange your composition by placing your layers above the controllers and add some style options to give volume to your marbles.
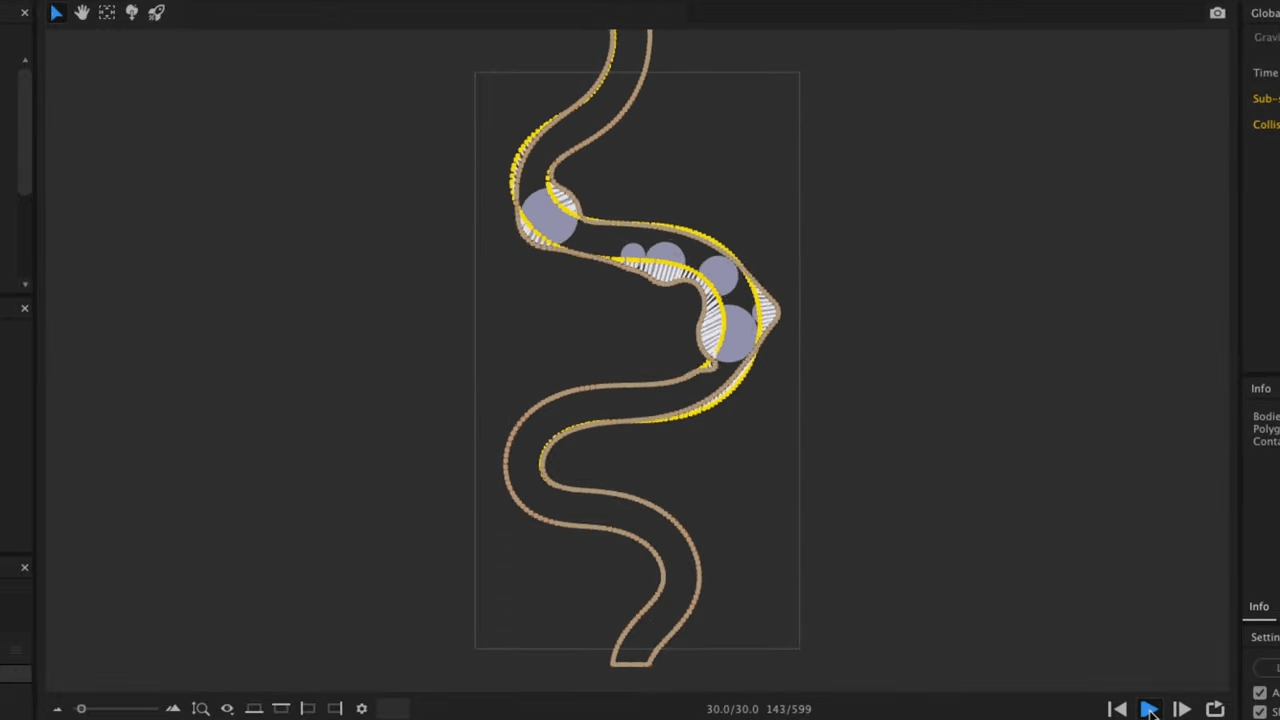
Step 5: Launch Newton and Place Marbles
- Launch Newton and start by correctly placing your marbles.
- Select all yellow objects and set them to Ae-matic to keep them static with physical constraints.
- Adjust the global properties of your simulation, set steps to 20, turn off collision tolerance, and increase the tension of your AEmatics to three.
Step 6: Fine-Tune Object Interactions
- Ensure objects pass through the funnel by setting them to Dead, making them transparent to the marble animation.
- Adjust gravity settings so objects stay in place.
- Create a closed chain of weld joints between all objects to allow deformation while maintaining the tube's shape.
- Set the tension of the joints to 60 for better deformation as objects pass through.
Step 7: Fix Stuck Objects
- If objects get stuck at the end, change their collision group to ensure they no longer touch the marbles in group A.
- Remove the joints connecting them for smoother animation.
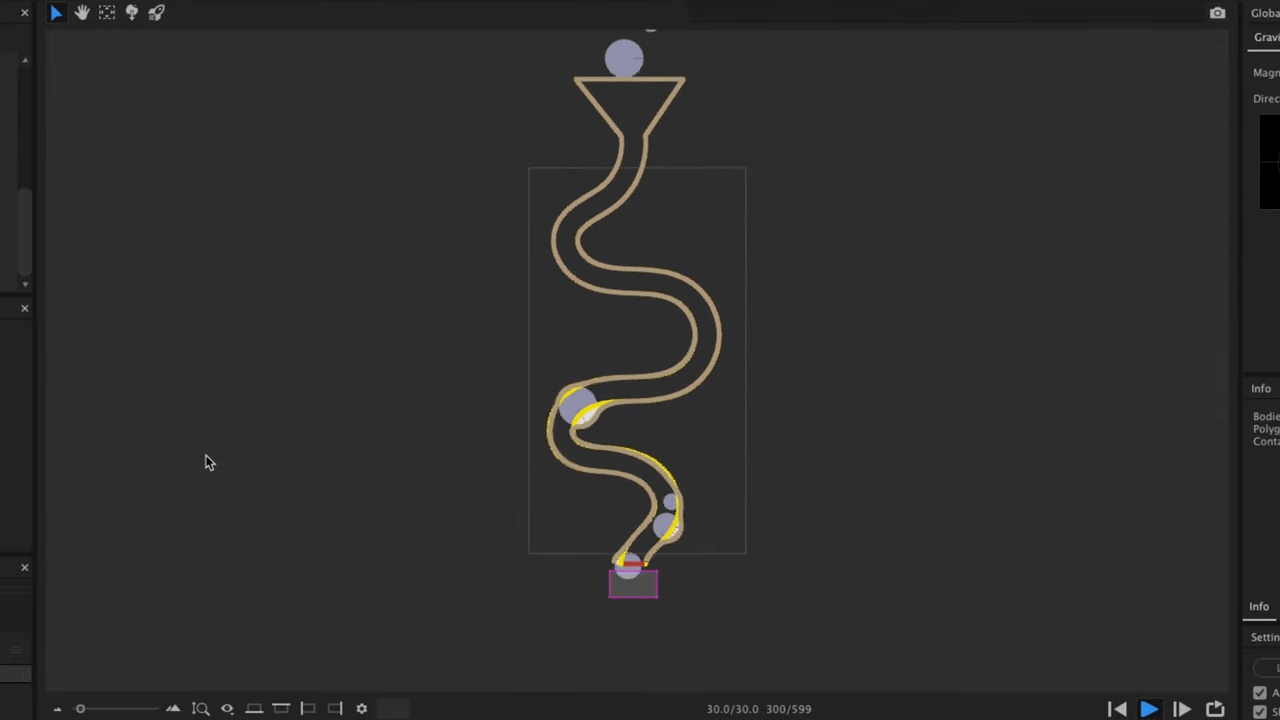
Step 8: Extend Animation with Teleportation
- Use Newton's teleportation function to create a longer animation.
- Create an object in After Effects to serve as a portal.
- In Newton, set this new object to static and enable the portal under teleportation.
- Make your marbles teleportable so they return to their starting point when exiting the tube.
Step 9: Final Touches and Rendering
- Increase the duration of the simulation and offset your marbles in time for a seamless animation.
- Render your simulation and head back to After Effects.
- Open your new composition, hide the yellow objects, and display your tube.
- Adjust the position and settings of your composition to match the simulation length.
- Preview your animation and customize the look of your objects as desired.
Conclusion
That's it! You've now got a dynamic, deforming tube animation with marbles passing through. Enjoy customizing it further!
