Introduction
Newton is a 2D physics simulator for Adobe After Effects CS5 or later.
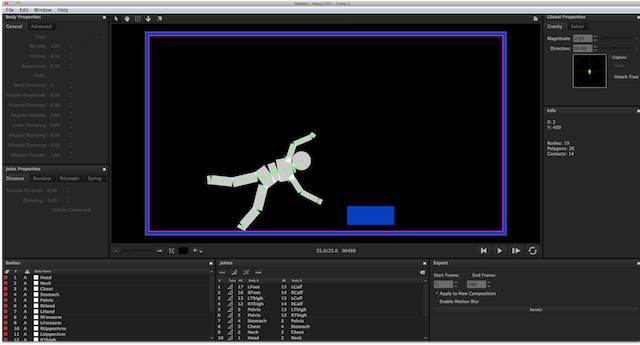
Newton interprets 2D layers of the current composition as rigid bodies in a physical world. These bodies can collide with each other, slide, bounce, and react to gravity. Bodies can also be connected to each other using joints. Newton can deal with various types of bodies: some types allow bodies to be animated in After Effects while reacting to physical forces, others are entirely controlled by the solver. Newton also provides a simple, clean, and easy to use interface, offering fast OpenGL preview and intuitive controls. Once simulation is completed, Newton export the animation to After Effects using standard keyframes.
Bodies 
Newton transforms composition 2D layers (except audio, guide, null and video-disabled layers) into physical objects called bodies. These bodies can bounce, slide, and collide with each other. To change the properties of a body, you must first select it in the body list or directly in the preview. One of the most important body properties is the body type.
Body settings can be copied from one body and reapplied to other bodies using the Copy/Paste Body Settings commands in the Edit menu.
General Properties 
Type
Newton supports the following types of body:
- static : a non-moving body.
- kinematic : a body animated in After Effects with keyframes or expression. Its motion path is not altered by the physics until the end of the animation (in the case of keyframe animation), where the body becomes dynamic.
- dynamic : a body fully controlled by the solver (default type).
- dormant : a body not influenced by gravity until another body collides with it, and makes it dynamic.
- AEmatic : a body animated in After Effects with keyframes or expression, but also influenced by the physics (hybrid type between kinematic and dynamic types).
- dead : a body ignored by the solver (in terms of collision response).
Density
This parameter is used to determine the mass of a non-static body. High-density body doesn't fall down faster than low-density body (they fall at the same speed), however when collision occurs, the difference of density is easily noticeable.
Friction
This parameter is used to make bodies slide along each other. A value of 0 turns the friction off, and a value of 1 makes the friction strong.
Bounciness
This parameter is used to make bodies bounce. A value of 0 means no bounciness (e.g., a ball falling on the ground will not bounce), a value of 1 means maximum bounciness (e.g., a ball falling on the ground will bounce indefinitely).
Color
This parameter sets the body color used in the simulation preview.
Mesh Precision
This parameter is used when a body is formed by a shape with round corners. Default value is 2. Higher value increases precision but performance may suffer. For complex shapes, it is highly recommended to keep this value as low as possible.
Velocity Magnitude, Velocity Direction
These parameters set the body's linear velocity vector, which is defined by its magnitude and its direction angle. Force is applied to the center of mass. You can also set the linear velocity directly in the preview by using the Velocity tool (P).
Note:- When you move the velocity handle, you can see the body's trajectory.
Angular Velocity
This parameter sets the angular velocity of a body. Force is applied to the center of mass.
Linear Damping
This parameter is used to reduce the linear velocity of a body.
Angular Damping
This parameter is used to reduce the angular velocity of a body.
AEmatic Damping
This parameter is used only by AEmatic bodies. It corresponds to the damping coefficient of the joint connecting the motion path set in AE (desired path) and the motion path determined by the solver.
AEmatic Tension
This parameter is used only by AEmatic bodies. It corresponds to the tension of the joint connecting the AE motion path and the motion path determined by the solver.
Note:- You can move the anchor of the AEmatic connection using the Anchor tool (Y).
Advanced Properties 
Collision Group, Collide With
You can assign a collision group to a body (five groups are available), and specify which groups the body should collide with. By default every body belongs to the same group and can collide with every other groups.
Fixed Rotation
This parameter is used to prevent body rotation.
Gravity Scale
This parameter allows you to set a custom gravity per body. A value of 0 turns gravity off for the body.
Note that negative values are allowed.
Use Convex Hull
This parameter allows you to approximate the geometry of a complex body, using the convex hull of the shape vertices. In some situations, when working with text for instance, this option can highly increase performances while producing realistic simulation.
Magnetism Type
This parameter allows you to transform a body into a magnet that can either attract or repulse other bodies.
Magnet Intensity
This parameter specifies the intensity of magnetism.
Magnet Distance
This parameter determines the maximum distance at which the magnet is active.
Accept Magnetism
This parameter specifies whether the body is sensitive to magnetism of other bodies.
Joints 
Newton allows you to create joints between bodies. A joint is used to add a constraint between two bodies.
To add a new joint, select two bodies and use one of the Add Joint buttons above the joint list. To remove a joint, select it in the joint list (or press W when one of the connected bodies is selected), and click on the Remove Joint button (or press Alt W). To modify joint properties, you must first select the joint, and then change its properties.
Joint settings can be copied from one joint and reapplied to other joints of the same type using the Copy/Paste Joint Settings commands in the Edit menu.
Notes:- Use the Anchor tool (Y) to reposition joints anchor.
- When multiple bodies are selected, multiple joints are created at once (see keyboard shortcuts section for details). The order of selection is important when creating multiple joints. Use the Shift key while clicking on the bodies to create an ordered selection (e.g. for creating a chain of bodies).
- You can customize the appearance of joints (colors and stroke width) in the Preferences dialog.
Distance Joint
A distance joint implies that the distance between two points (joint anchors) on two bodies must be constant. This is not always true since you can give elasticity to the joint, and obtain a soft distance joint.
Tension
This parameter allows you to give elasticity to the joint. This can be used for instance to create a soft body (by connecting several small bodies with soft distance joints).
Damping
This parameter is used to reduce or soften the amount of motion.
Collide Connected
This parameter specifies whether the two connected bodies should collide with each other.
Pivot Joint
A pivot joint forces two bodies to share a common anchor point or pivot point. The joint angle is the relative rotation between the two bodies and can be restricted to a specific range.
Enable Limit
This parameter is used to force the joint angle to remain between a lower and upper bound.
Lower Angle
This parameter specifies the lower bound of the joint angle.
Upper Angle
This parameter specifies the upper bound of the joint angle.
Enable Motor
This parameters determines whether the joint motor is enabled.
Motor Speed
This parameters allows you to specify the joint speed.
Max Motor Torque
This parameters allows you to specify the maximum motor torque allowed.
Collide Connected
This parameter specifies whether the two connected bodies should collide with each other.
Piston Joint
A piston joint allows for relative translation of two bodies along a specified axis. Its parameters are similar to the pivot joint parameters, except that rotation is replaced with translation.
Enable Limit
This parameter is used to force the joint translation to remain between a lower and upper bound.
Lower Translation
This parameter specifies the lower bound of the joint translation.
Upper Translation
This parameter specifies the upper bound of the joint translation.
Enable Motor
This parameters determines whether the joint motor is enabled.
Motor Speed
This parameters allows you to specify the joint speed.
Max Motor Force
This parameters allows you to specify the maximum motor force allowed.
Collide Connected
This parameter specifies whether the two connected bodies should collide with each other.
Spring Joint
A spring joint constrains two bodies to move like they were connected by a spring.
Springiness
This parameter controls the strength of the spring.
Damping
This parameter allows you to reduce the amplitude of oscillations.
Desired Length
This parameter specifies the length of the spring when it is inactive.
Preview 
Newton provides an OpenGL view to preview the result of the simulation. The view handles mouse and keyboard events. For instance, you can zoom and pan in the view, or select and move bodies in the scene. A contextual menu also provides some common operations (accessible from both the preview and the body list).
Tool Buttons
There are five tool buttons above the preview, each one being used for a specific operation :- selection : to select bodies and move them.
- hand : to translate or pan the view.
- anchor : to modify joint or AEmatic anchors.
- gravity : to set gravity directly in the preview.
- velocity : to set bodies velocity directly in the preview.

- You must select at least one joint (or an AEmatic body) before using the Anchor tool.
- You must select at least one body before using the Velocity tool.
- When the Velocity tool is selected, holding down Alt when you click on a body allows you to select it.
Zoom
You can zoom in and out the preview by using either the zoom slider, the mouse wheel, or the dedicated buttons. The Best Fit Zoom button allows you to automatically scale the scene to fit the view.

Background Color
By default the preview background color is equal to the current background color of the composition. You can change it by using the color picker next to the zoom slider.

Preview Options
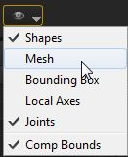
The following visualization options are available in the View Options popup menu:- Shapes: displays all shapes
- Mesh: displays internal shapes representation (Newton uses the poly2tri library to triangulate non-convex shapes)
- Bounding Box: displays axis aligned bounding box
- Local Axes: displays local X and Y axes, in red and green respectively
- Joints: displays all joints
- Comp Bounds: displays a thin frame that indicates the bounds of the composition
Simulation Commands
To start the simulation, click on the Play button (shortcut key: 0). The other available commands allow you to restart (shortcut key: Enter (numpad) or Home), step one frame (shortcut key: 1 or PageDown) and loop the simulation from 0 to current time (shortcut key: 2).

Scene Snapshots
The Take Scene Snapshot button above the preview allows you to save temporarily the current scene settings. To restore a Scene Snapshot, double-click on it. You can delete it by using either the context menu of the snapshots list (right click > Delete), or the delete/backspace key. This feature is useful for creating multiple versions of the same scene without having to export separated settings file for each one.

Context Menu
A context menu regrouping some common operations is available by right-clicking in the preview. This context menu is also attached to the body list.
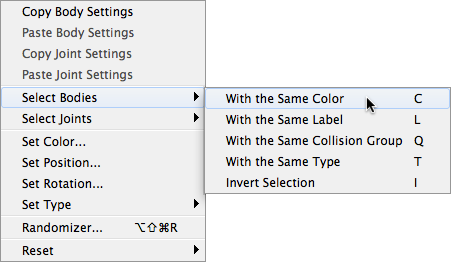
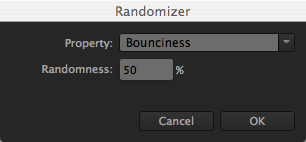
Randomizer command opens the Randomizer dialog. It allows you to generate random value for a given property. With some bodies or joints selected, open Randomizer, then select a property in the list, and specify the amount of randomness.
Gravity 
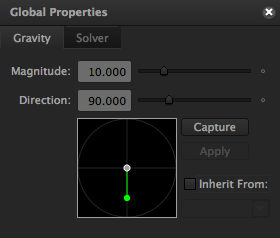
Gravity is a force acting on all bodies. You can set its magnitude and direction using the text fields, the gravity view or the Gravity tool (G). You can animate it either by capturing mouse movement, or using the Inherit From checkbox that allows you to select a composition layer.
Magnitude
This parameter specifies the magnitude of the gravity vector.
Direction
This parameter specifies the direction of the gravity vector. When changing the gravity in the gravity view or with the Gravity tool, hold the Shift key to snap the vector to the nearest axis.
Inherit From
Use this option if you want the gravity to inherit its value from the position of a layer. For instance, position [0,10] represents the default gravity which has magnitude 10 and direction 90°.
Capture, Apply
When Capture is active, every mouse movement in the gravity view is recorded. By clicking on the Apply button, the recorded values are assigned to a new null layer that is automatically selected in the popup menu.
Note:- Starting dragging the mouse in the gravity view, with the Capture switch on, also starts the simulation.
Solver 
Internally Newton uses part of the Box2D library, a 2D physics engine initially developed for game programming.
Time Divider
This parameter affects the time step used for solving physical equations. It can be viewed as a time remap controller. For instance, a value of 5 produces a slower animation similar to high precision slow motion. Default value is 1.
Collision Tolerance
This parameter specifies the constraint and collision tolerance of the solver. Default value is 50. Smaller value often reduces gap between touching bodies, but may introduce overlap or instability when collision occurs.
Substeps
This parameter allows you to subdivide the time step. Default value is 2. Higher value may produce a simulation of higher quality at the expense of extra computation time.
Preferences 
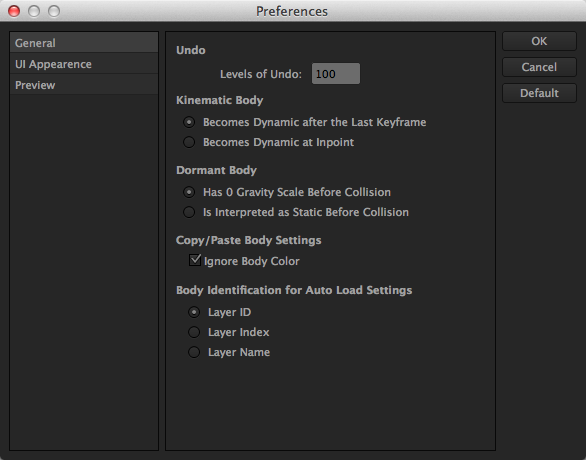
Newton's preferences dialog allows you to customize certain aspects of the plug-in, such as the appearence of the user interface, the joint colors, or the behavior of kinematic bodies.
General
Undo
This parameter specifies the maximum number of undo levels.
Kinematic Body
A kinematic body become dynamic after a certain criteria is met. You can choose between Becomes Dynamic after the Last Keyframe and Becomes Dynamic at Inpoint options.
Dormant Body
A dormant body doesn't move until another body collides with it. This option allows you to specify how Newton must interpret a dormant body before collision. You can choose between Has 0 Gravity Scale before Collision and Is Interpreted as Static before Collision options. The first option tells Newton to interpret dormant bodies as dynamic that are not influenced by gravity. The second option tells Newton to interpret dormant bodies as static bodies. These options yield slighlty different simulations when collision occurs.
Copy/Paste Body Settings
You can choose whether the body color is also pasted when pasting body settings.
Body Identification for Auto Load Settings
You can specify the identifier that must be used by Newton when it auto-loads scene settings. Layer ID is an After Effects internal parameter attached to the layer, it is tied to a specific comp. Layer Index is the position of the layer in the layers stack.
UI Appearence
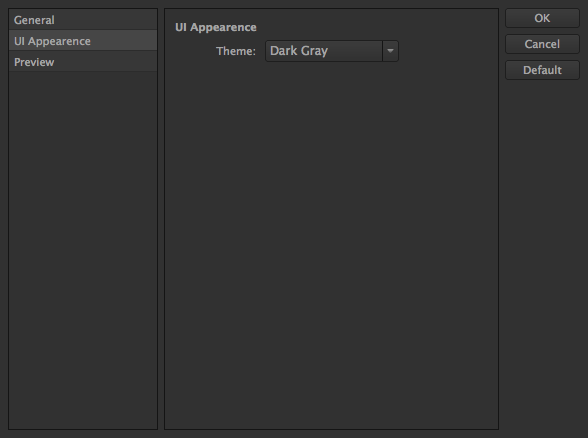
Theme
This parameter specifies the brighness level of Newton's interface. You can choose between Dark Gray, Light Gray, or White.
Preview
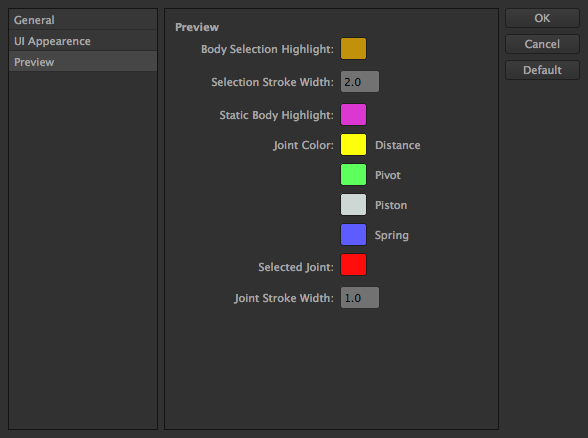
Body Selection Highlight
This parameter sets the color used for highlighting the selected bodies.
Selection Stroke Width
This parameter sets the width of the stroke used for highlighting the selected bodies.
Static Body Highlight
This parameter sets the color used for highligting static bodies.
Joint Color
This parameter sets the joint color associated with its type.
Selected Joint
This parameter sets the color of the selected joints.
Joint Stroke Width
This parameter sets the width of the stroke used to draw joints.
Actions History 
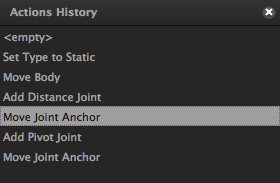
You can use the Actions History panel to quickly jump between past operations. The maximum levels of undo is set to 100 by default, but this can be changed in Newton Box2 dialog. To clear history, right-click in the view and chosse Clear.
Loading and Saving Settings 
Once you have assigned settings to bodies (including position and rotation), you can save them as an XML file for future use. If the Auto Load/Save Settings option is active, Newton will try to load (at startup) or save (at quit) the last scene settings. This option is particularly useful when you need to jump frequently back and forth between Newton and the same After Effects composition.

When loading settings, Newton tries to find a matching layer for each saved body. This identification can be done using either layerID (an After Effects internal parameter to identify a layer in a specific comp), layer name or layer index.
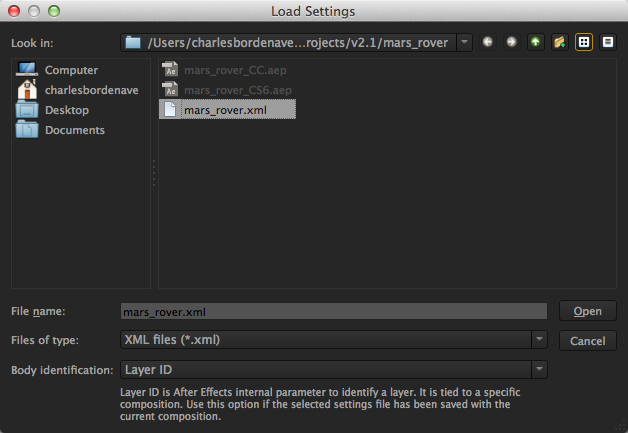
- For instance, if you have created a copy of a composition for which you had saved Newton settings, and you would like to reapply the same settings to the new composition, you would choose either Layer Index (if you didn't add or remove layers in the duplicate composition), or Layer Name (if you didn't rename layers in the duplicate composition).
Separating Shapes 
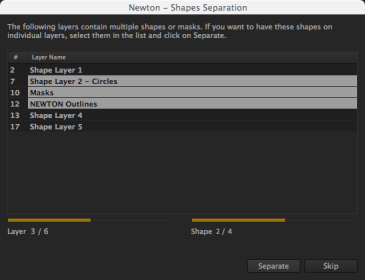
When a layer contains more than one mask or path, the Shapes Separation dialog pops up. You must specify whether Newton should interpret each shape of a layer as an individual layer (AE) or body (Newton). If you don't separate shapes, the compound shape will be considered.
Applying Result 
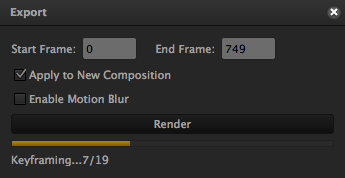
When your are satisfied with the simulation, specify the frame range to be exported and hit Render. Two additional options allow you to specify whether the result must be applied to a copy of the original composition, and whether motion blur must be enabled for moving bodies.
The simulation is solved again, but this time animation data are stored in memory. At the end of the simulation, stored values are converted to standard After Effects keyframes, and Newton quits.
Keyboard Shortcuts 
You can open the Keyboard Shortcuts dialog either using the menu command Help > Keyboard Shortcuts... or using Alt . shortcut. The following table enumerates the available shortcuts.
Notes:- Ctrl is replaced with Cmd on Mac.
| Key | Result |
|---|---|
| Setting type of selected bodies | |
| S | Set to static |
| K | Set to kinematic |
| D | Set to dynamic |
| A | Set to dormant |
| M | Set to AEmatic |
| E | Set to dead |
| Moving/Rotating selected bodies | |
| ←↑→↓ | Move by 1 pixel |
| Shift ←↑→↓ | Move by 10 pixels |
| +/- | Rotate by 1 degree |
| Shift +/- | Rotate by 10 degrees |
| Selecting bodies | |
| C | Select bodies with the same color |
| L | Select bodies with the same label |
| Q | Select bodies with the same collision group |
| T | Select bodies with the same type |
| I | Invert selection |
| Selecting joints | |
| W | Select joints of selected bodies |
| Alt W | Remove joints of selected bodies |
| F | Select joints with the same type |
| Selecting tools | |
| V | Select the Selection Tool |
| H | Select the Hand Tool |
| Space Bar | Select temporarily the Hand Tool |
| Y | Select the Joint Anchor Tool |
| G | Select the Gravity Tool |
| P | Select the Velocity Tool |
| Simulation commands | |
| 0 | Start or Pause |
| Home | Go to first frame |
| 1 or Page Down | Go to next frame |
| 2 | Loop simulation from 0 to current time |
| Joint anchors | |
| X | Move AEmatic anchor to center of mass |
| Alt move | Relative shift of selected AEmatic anchors |
| Move anchorA and anchorB of selected distance joints | |
| Relative shift of selected pivot joints | |
| Move anchorA and anchorB of selected spring joints | |
| Ctrl move | Snap anchor to nearest contour vertex |
| Creating distance joints | |
| Alt Click | Shortest distance |
| Alt Shift Click | Shortest distance on anchorA-anchorB line |
| Ctrl Alt Click | Between every pair |
| Ctrl Alt Shift Click | Triangulation |
| Show or hide panels | |
| Alt 1 | Bodies |
| Alt 2 | Joints |
| Alt 3 | Global Properties |
| Alt 4 | Body Properties |
| Alt 5 | Joint Properties |
| Alt 6 | Export |
| Alt 7 | Info |
| Alt 8 | Actions History |
| Ctrl Alt 1 | Toggle all |
| Alt 0 | Reset to default layout |
| File menu commands | |
| Alt O | Load Settings |
| Alt S | Save Settings |
| Edit menu commands | |
| Ctrl Z | Undo |
| Ctrl Y | Redo |
| Auxiliary dialogs | |
| Ctrl Alt P | Preferences |
| Alt . | Keyboard Shortcuts |
| Ctrl Alt Shift R | Randomizer |
| F1 (win), Cmd ? (mac) | User's Guide |
| Miscellaneous | |
| Delete or Backspace | Remove selected scene presets |
| Ctrl Alt Shift +/- | Increase or decrease line width of selected open shape |
| Z | Reset pan and zoom |
| Ctrl Alt Q | Quit Newton |
Troubleshooting 
If you detect a bug or have any questions about Newton, do not hesitate to contact our customer support team.
